
Remington 870 Butt Pad Installation, Grinding
Remington 870 Butt Pad Installation, Grinding
Very interesting and useful information from EdwardE from Remington 870 Forum:
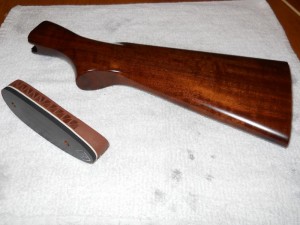
Remington 870 Wood Stock
Looking at the butt end of the stock, it had at least 2 different pads on it during it’s lifetime. Fortunately, the smaller pair of holes lined up with the new recoil pad.
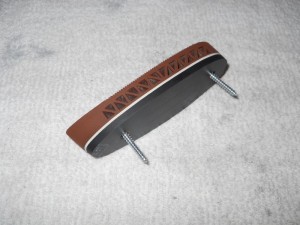
Remington 870 Wood Stock Recoil Pad
The install instructions were pretty easy to follow and I like the fact that there are no visible screw holes on the pad once the screws are installed. Makes for a nice, clean appearance.
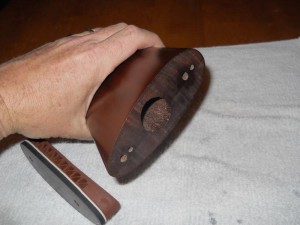
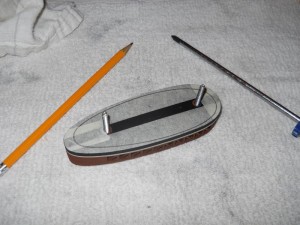
Remington 870 Wood Stock and Butt Pad
Once the pad was screwed on, I got to see how much pad material I was going to have to have to remove. Quite a bit as you can see. I used Rem Oil on the screwdriver to keep from damaging the pad.
Remington 870 Wood Stock Installation
I took the pad back off and layed out masking tape to mark the stock’s profile. I should have done this when I first installed the pad; would have saved me from having to take off and reinstall the pad. Lesson learned.
Remington 870 Butt Pad Installation
With the profile now marked, it was off to the garage and to the belt sander. I have one of those Lowes el-cheapo Ryobi 4″ bench top models. Pachmayr instructed using 80 grit for the material removal. This is where I strayed from the instructions and went with 120 grit. 80 removes a lot of material fast and leaves deeper marks to try and smooth out. The pad was $25.00 and I did not wish to go too far, too fast and have it end up trashed. 120 worked fast enough and left a very smooth finish.
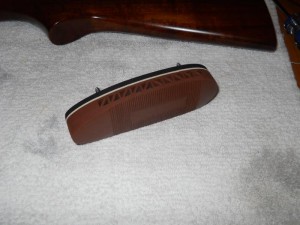
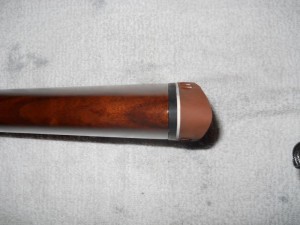
Remington 870 Wood Stock Butt Pad Installation
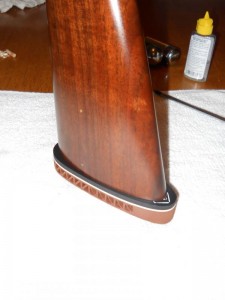
During the grinding process, I was most concerned with getting the tail of the pad to be correct. I think they look best following the angle of the stock; squared off, they just don’t look right. I watched some Youtube videos where the pros use some sort of jig to do this. I’m no pro nor am I willing to spend the cash on such a device. I just eyeballed it. After a little clean up with some Armor-All, the pad is installed and the stock is ready for use.
Remington 870 Wood Stock Butt Pad Installation
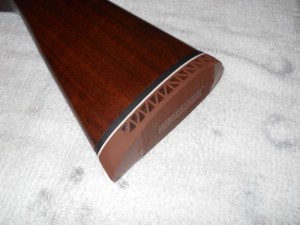
Remington 870 Wood Stock Butt Pad Installation
All in all, this process wasn’t that difficult at all. Take time, measure twice, go easy on the sanding and it all went well.
Related post: 5 Best Aftermarket Stocks for Remington 870

When you add a pad, either, either slip on or grind to fit, you change the length of pull, (fit). If you don’t know what you are doing, (which is not a sin), a gunsmith can check the fit and do the work in the $100 plus range. DIY is great but don’t mess up your gun.
Where did you buy that recoil pad?