
How to Build a 1911 From Start to Finish at Home
Article by JP
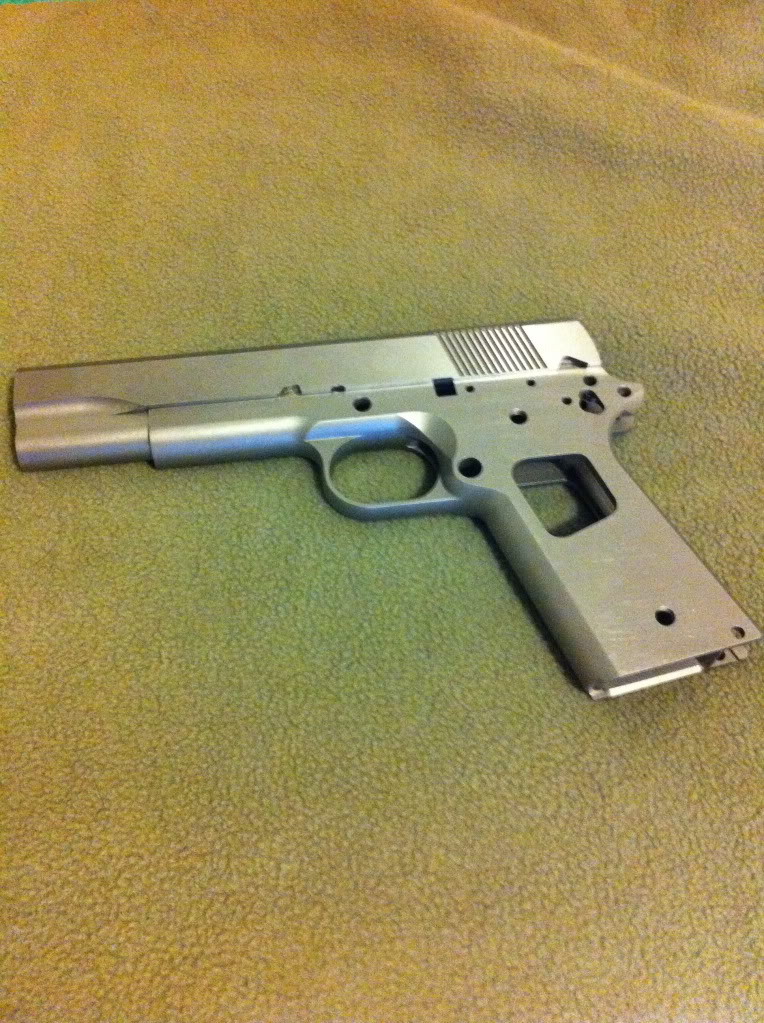
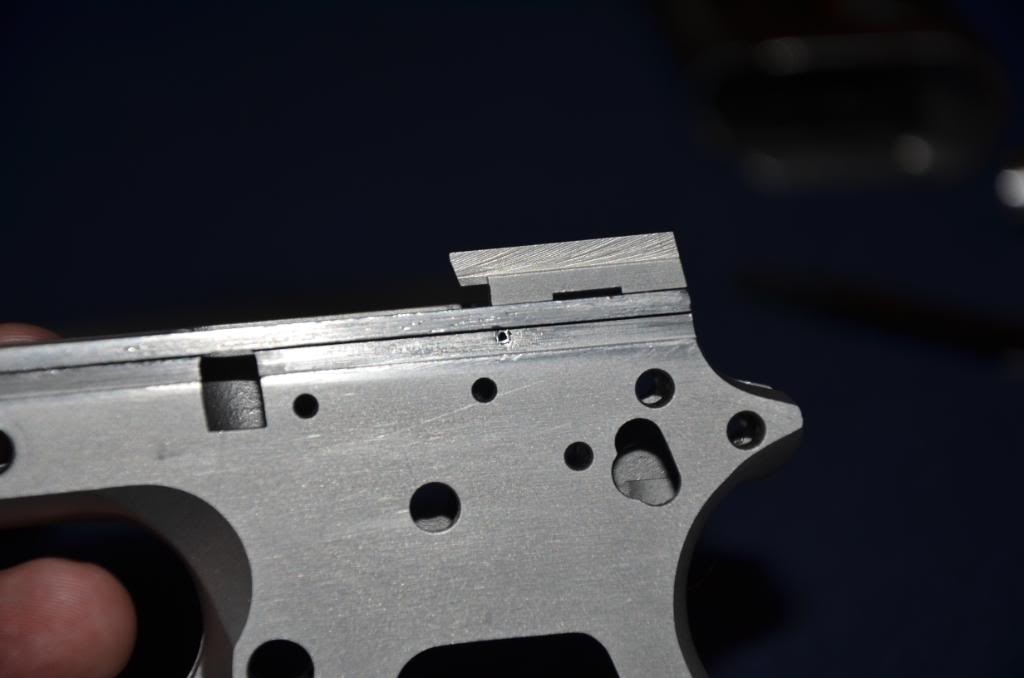
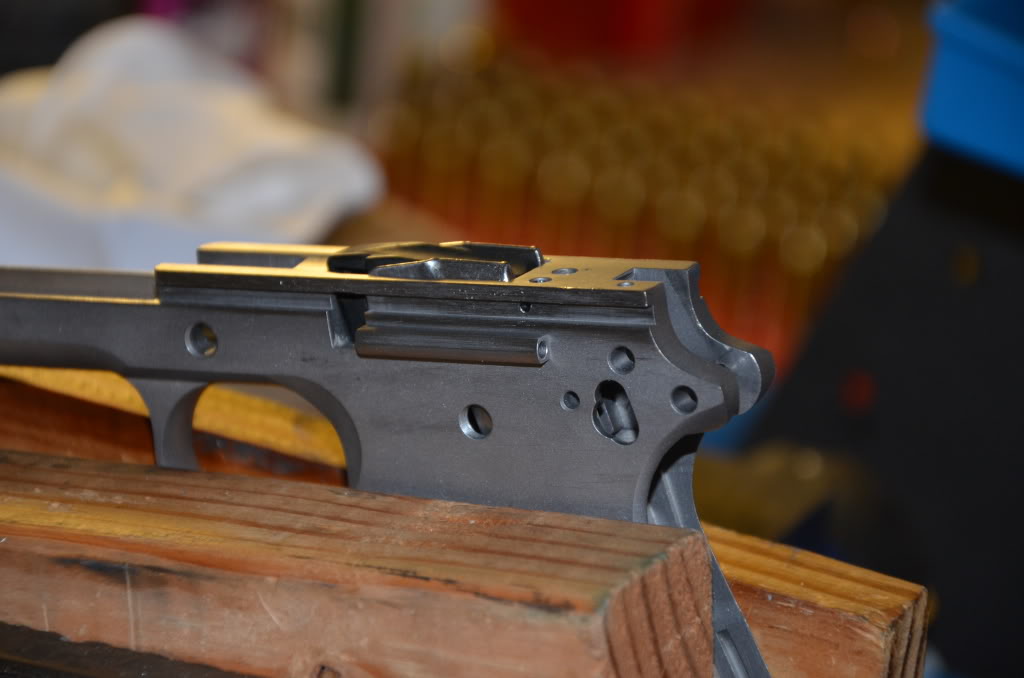
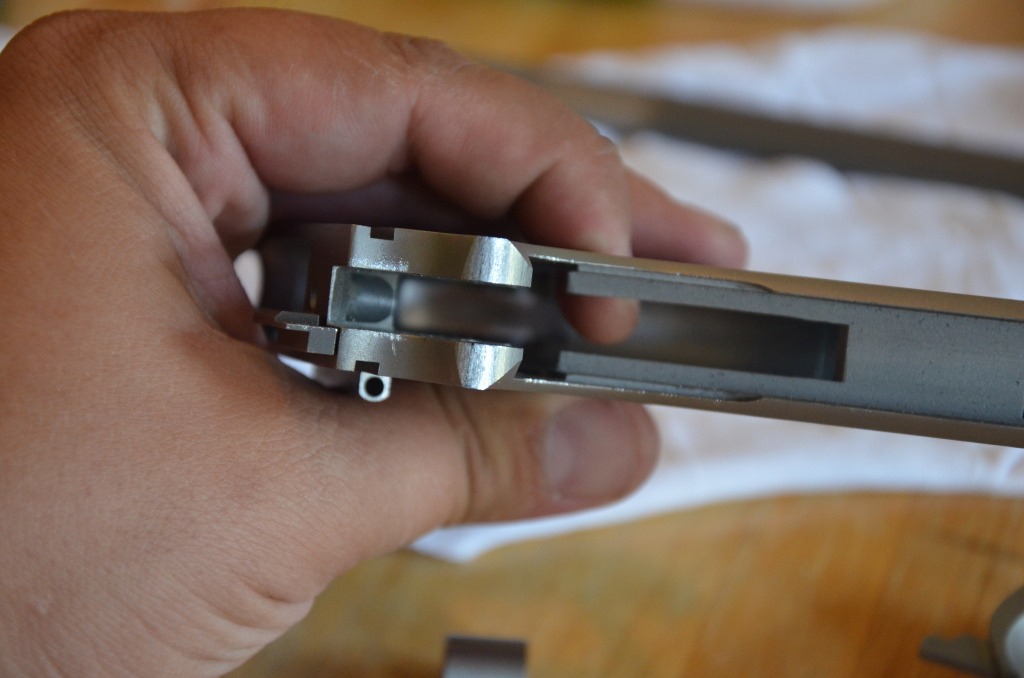
Slide to Frame fitting
Well, my slide/frame fitting tools arrived from Brownells and Enco. These included the following:
–Brownells slide/frame file
–Brownells lapping compound (600 and 800 pack)
-12″ x 18″ x 3″ block of granite…equilateral to 0.0001″
-220 grit sand paper sheets (for placing on the granite and sanding to a perfectly flat surface)
I got started by placing a sheet of sand paper onto the granite slab, turning the frame updside down in my hand, and sanding the top of the rails. This took a while, but I was able to knock off a couple of thousandths and get the rail height pretty close, or so I thought. I then turned the frame on its side and did the same thing to get the sides of the rails shaved down a bit. This was harder to do, and took more time.
I guess I started getting tired because I started to hurry. BIG mistake. I ended up forcing the slide a little too far onto the rails and it got stuck. After placing the frame in my bench vise and using a rubber mallet to remove the slide, I decided to take a break. At this point I also had shed some blood because I was gripping the sharp edges of the slide so tightly. Did I mention that this is actually relaxing?
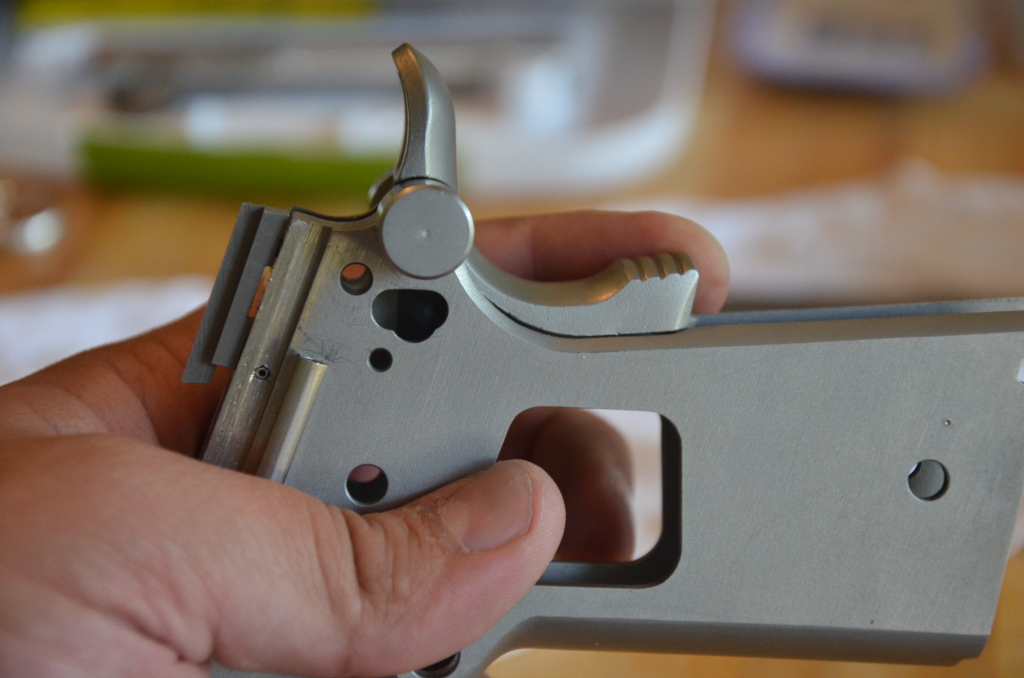
After dinner, I was refreshed and ready to go. I tried my best to smooth out the scratches from earlier when I got the slide stuck- looks like I may have some galling now. I’m not sure how to completely fix this, but I’ll tackle that tomorrow after a call to my gunsmith for advice.
As far as the rest of the fitting went, slowing down definitely helped. I applied oil to the frame and slide, then applied a small amount of 600 lapping compound to both as well. I moved slowly- short, smooth strokes and going further down the rail every few strokes or so. If I felt it start to get “sticky” I simply removed the slide, wiped everything down, and started again. It took a long time…a couple of hours, actually. But the end result is a very smooth slide to frame fit. I do have some slight hang up when the slide is moved fully to the rear of the frame- I’ll check on that tomorrow as well. Aside from that, and the galling, I am happy with my first slide/frame fitting attempt. It’s not perfect, but I learned a lot and I’m pretty certain I could avoid the whole stuck slide/galling thing next time. I’m hoping it’s fixable. If not, it’ll be a fairly pricey mistake!
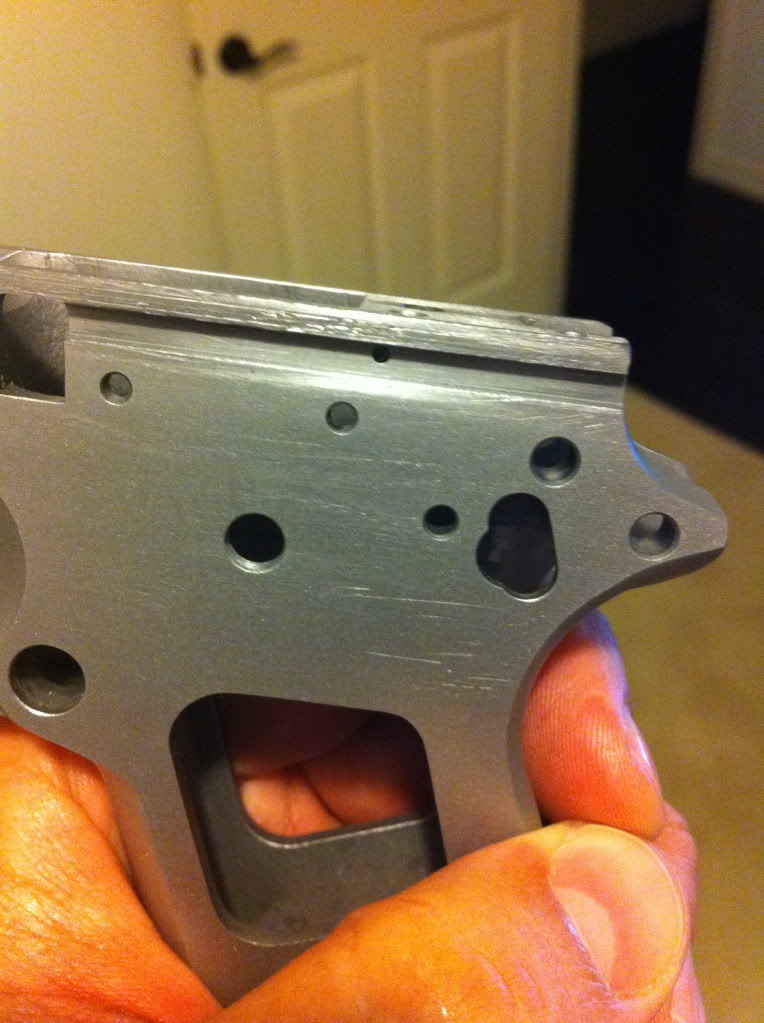
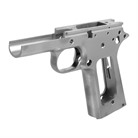
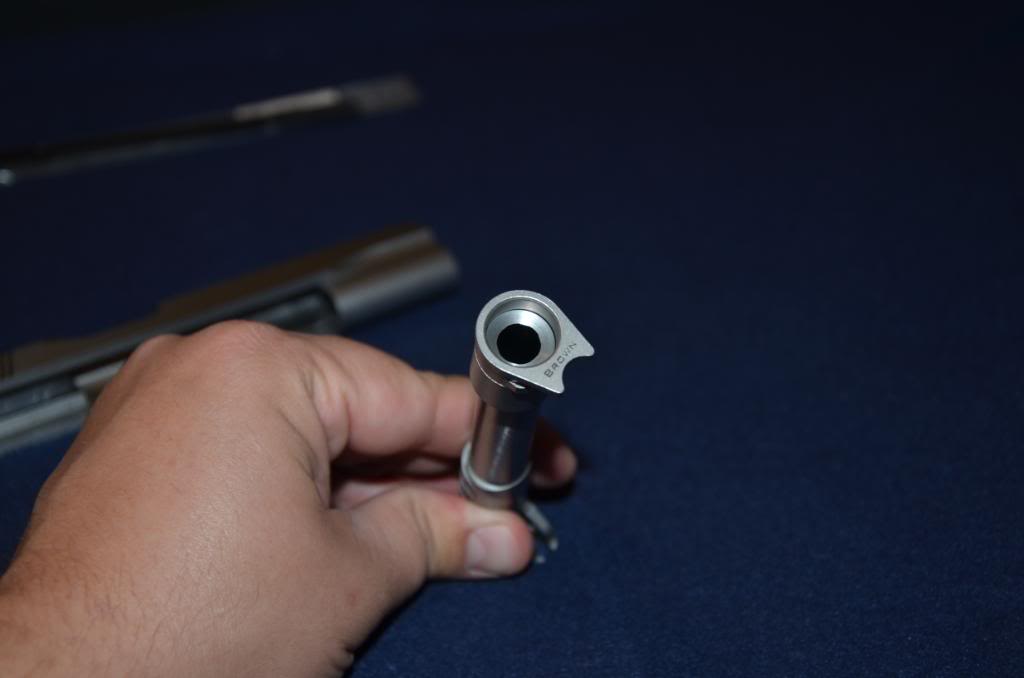
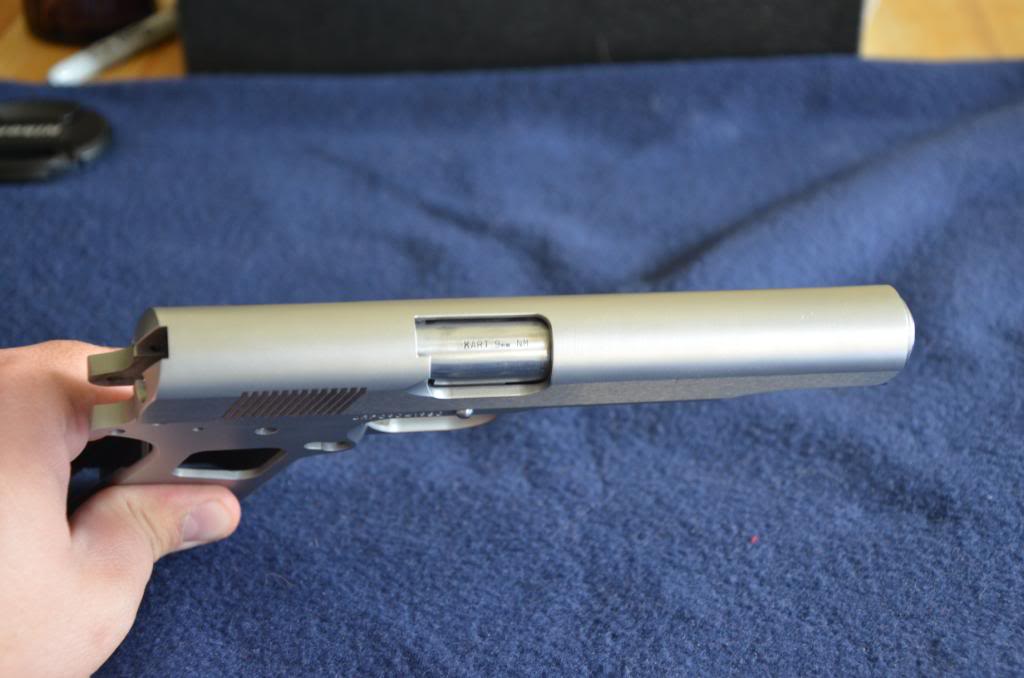
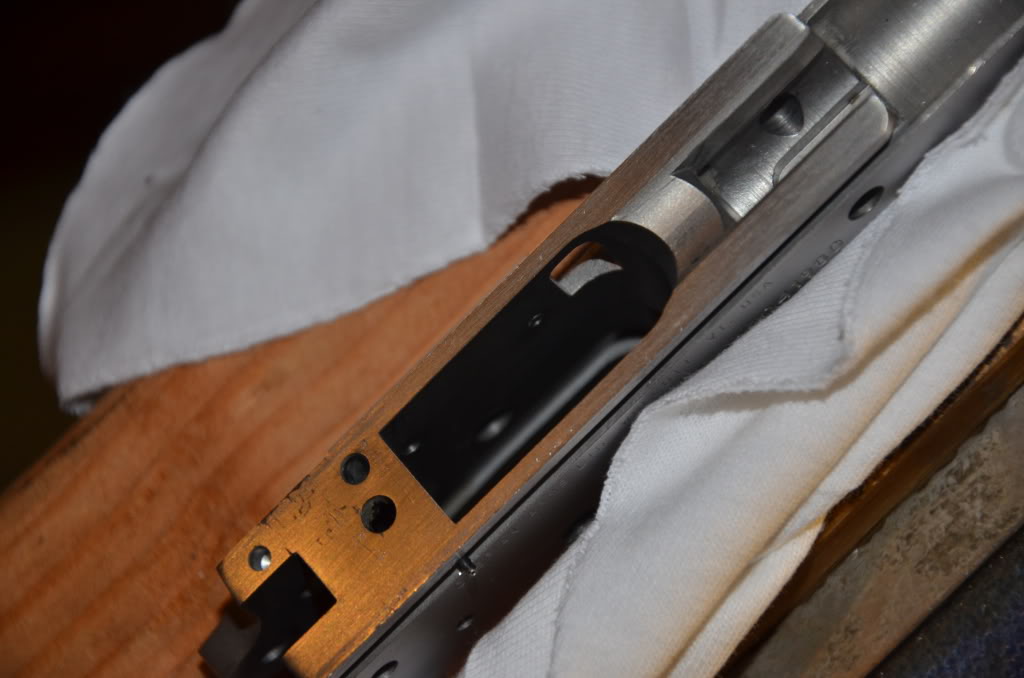
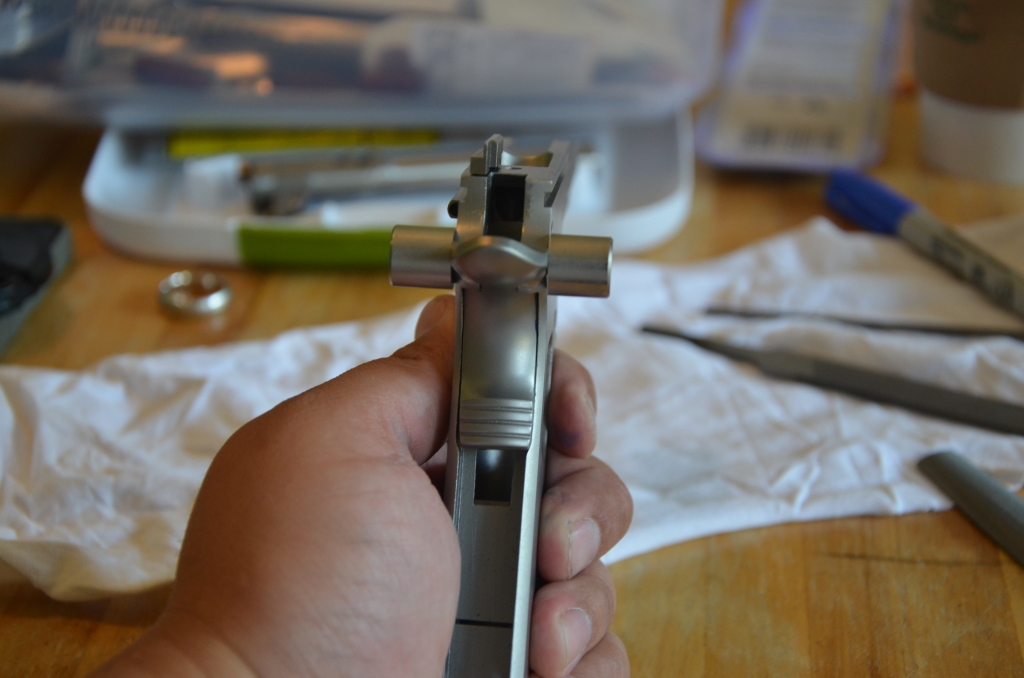
Caspian 1911 Slide and Frame
Caspian 1911 Slide and Frame
Caspian 1911 Slide and Frame
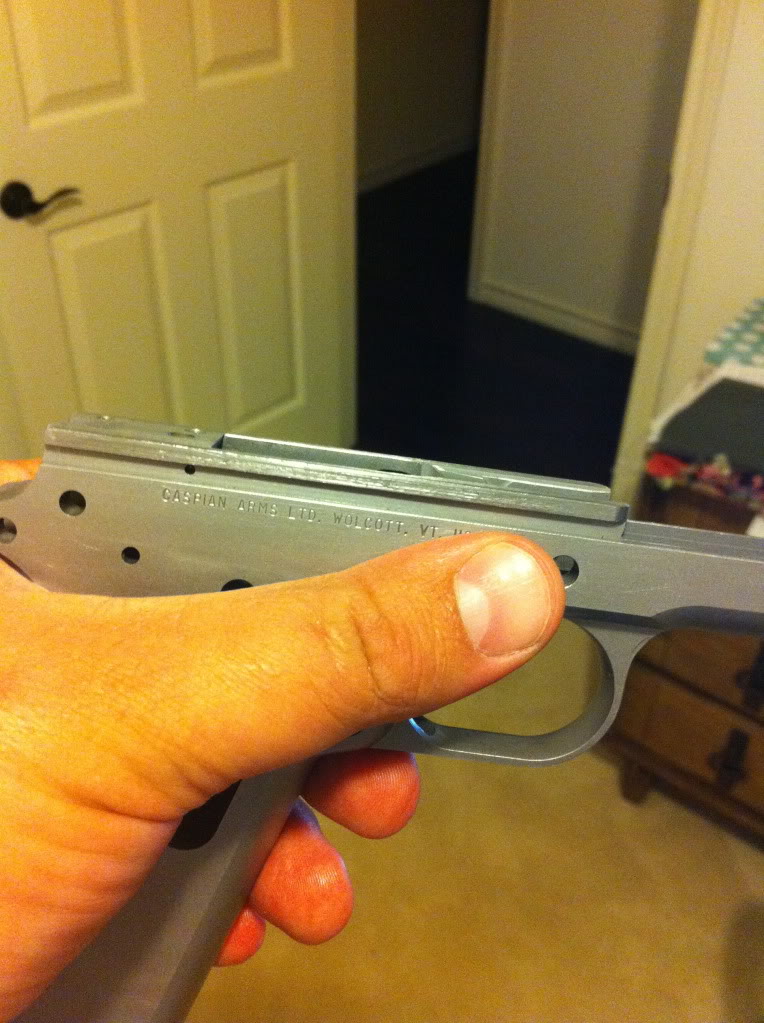
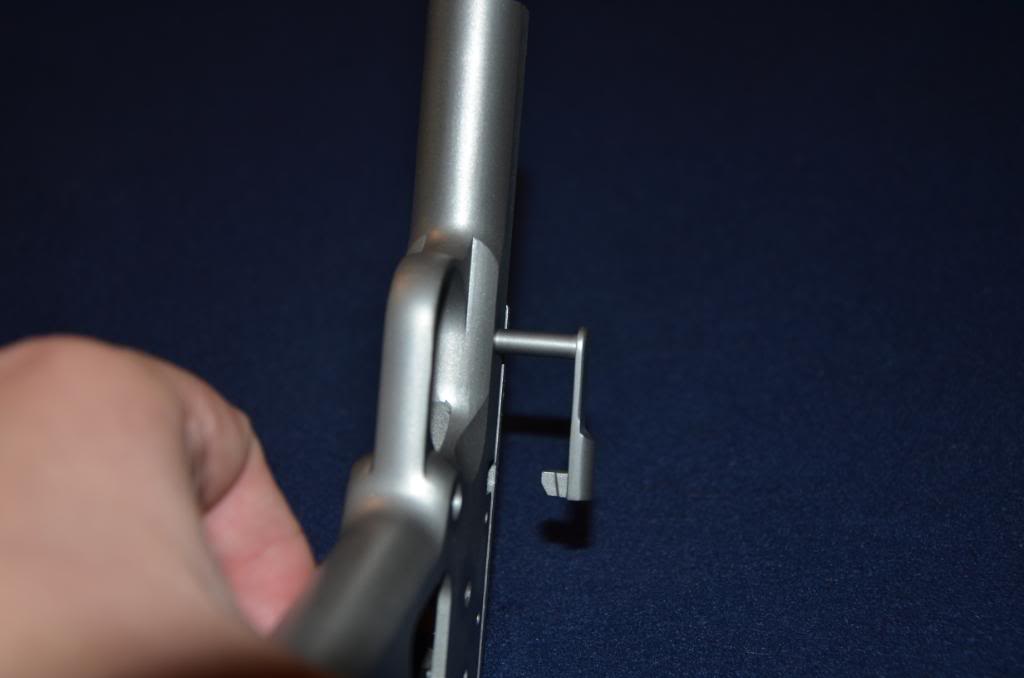
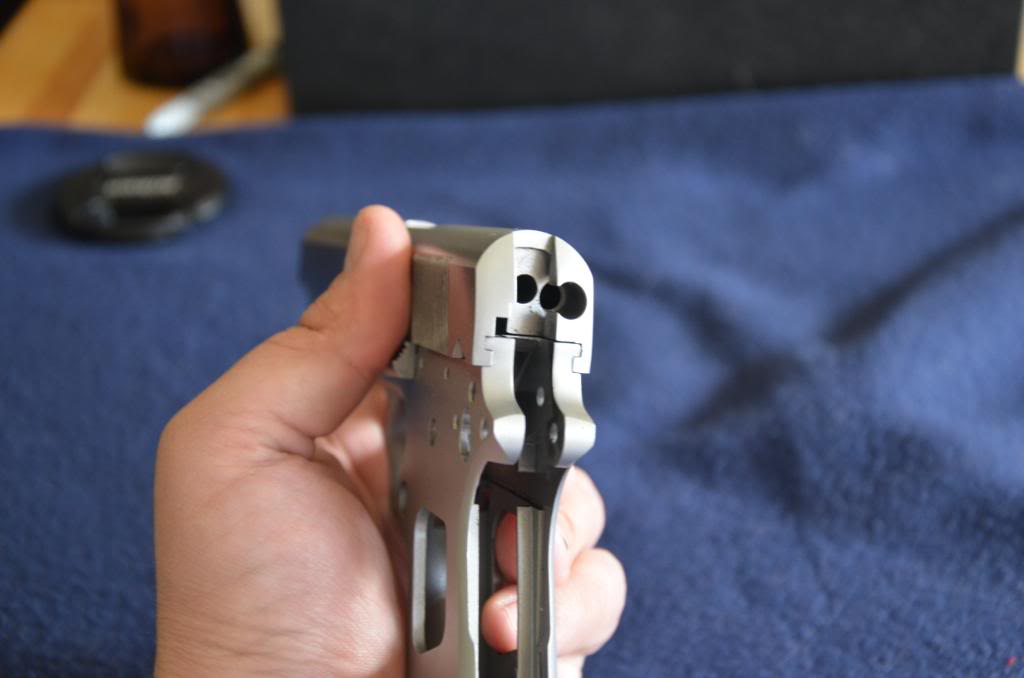
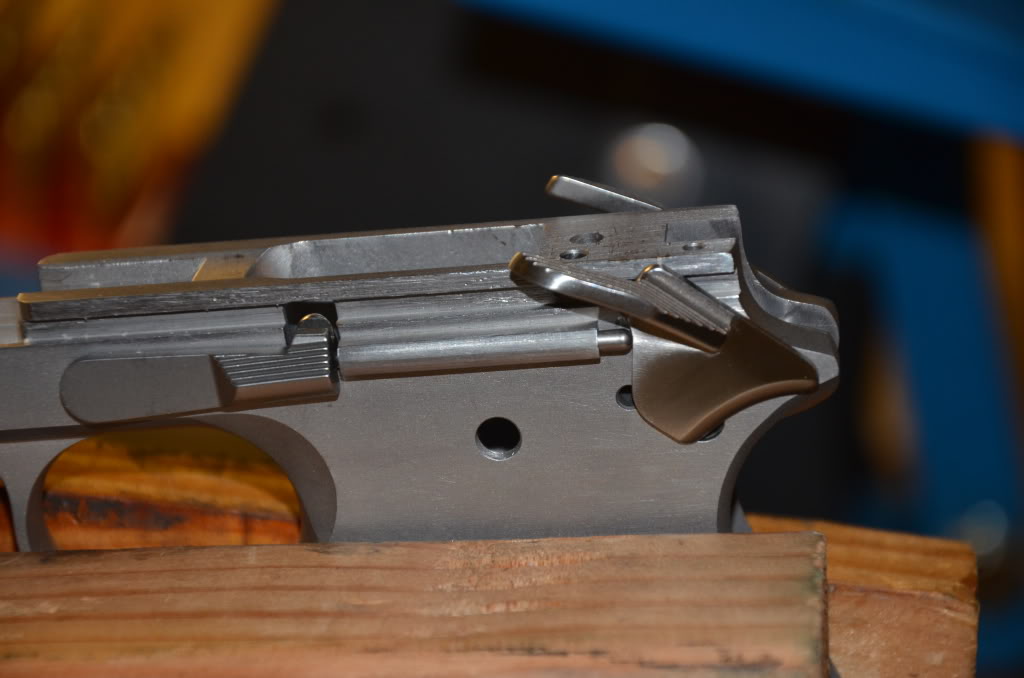
The slide sticks at the rear ever so slightly…
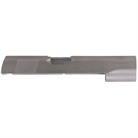
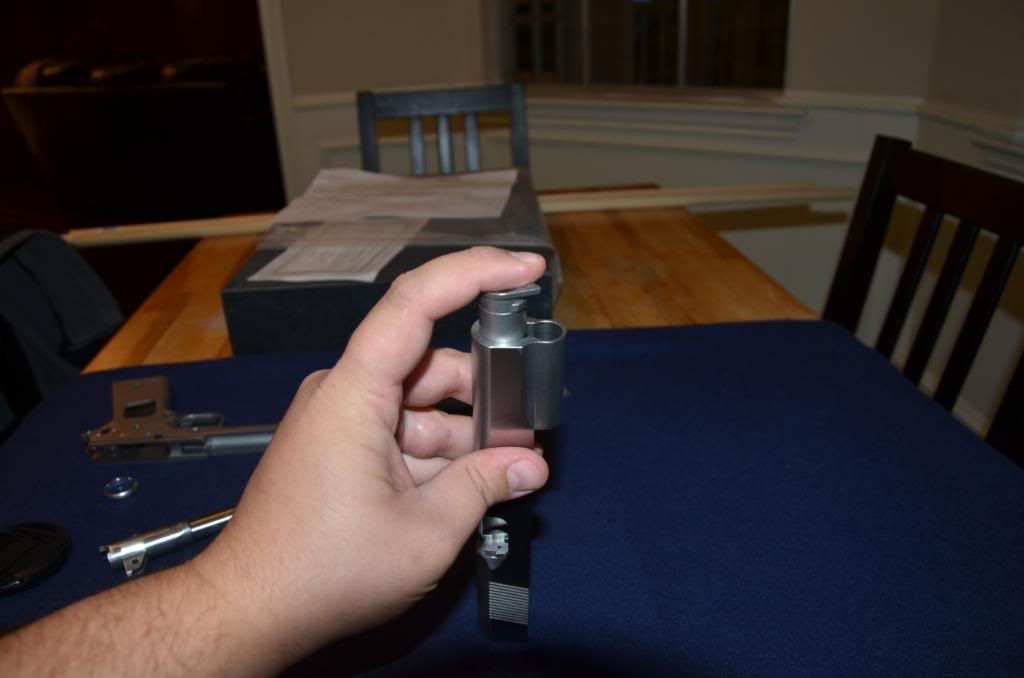
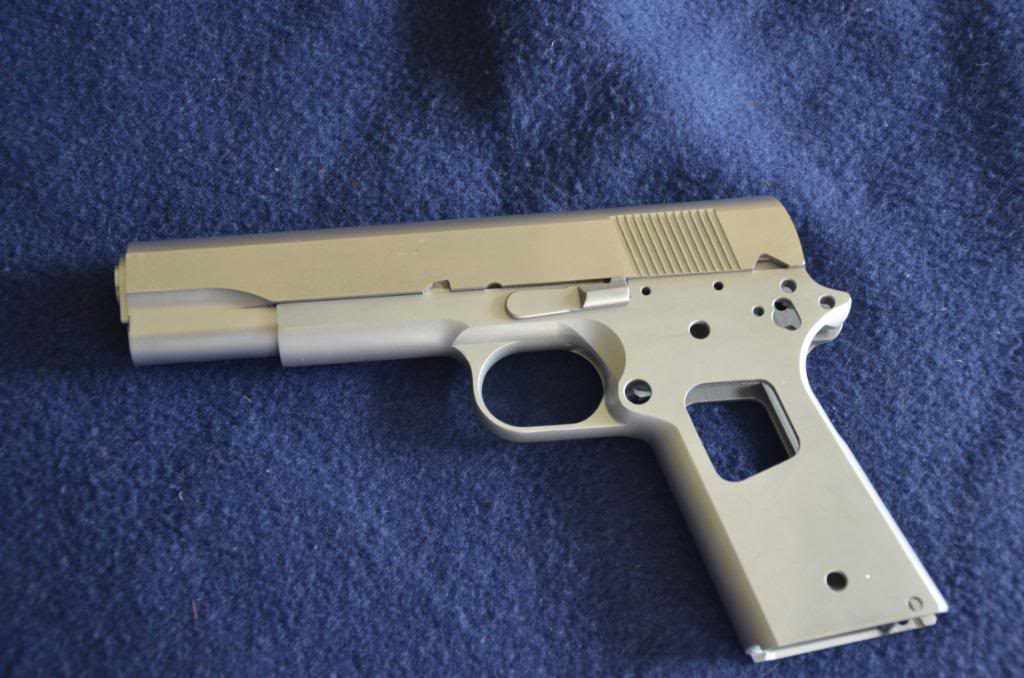
Caspian 1911 Frame and Slide
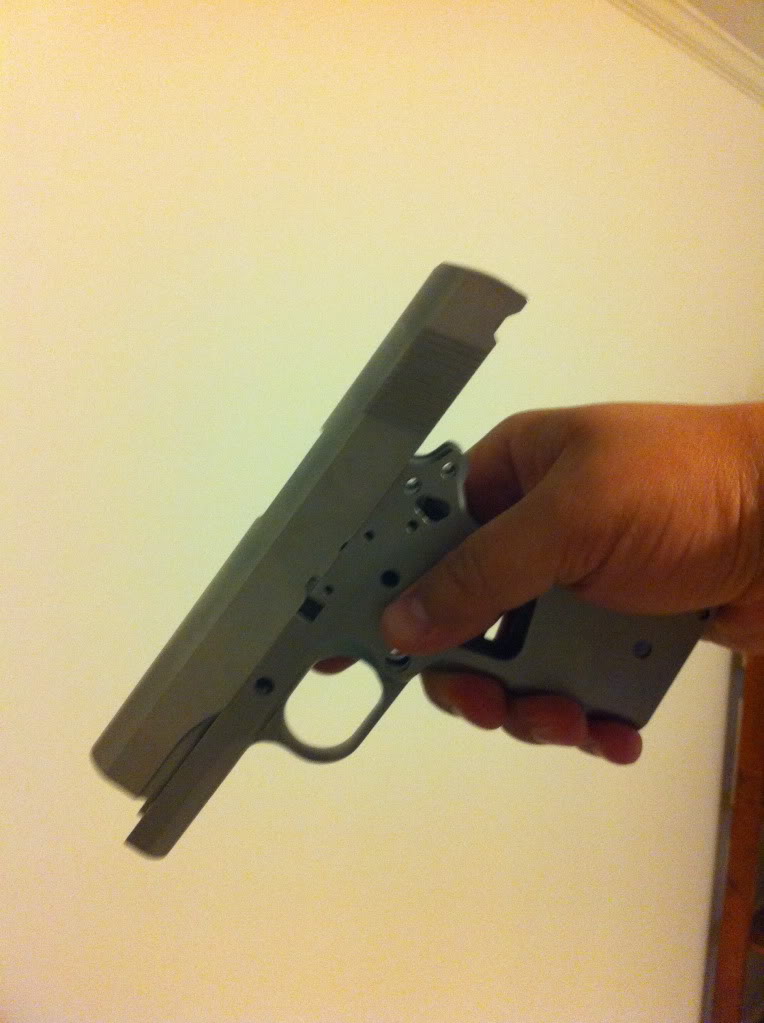
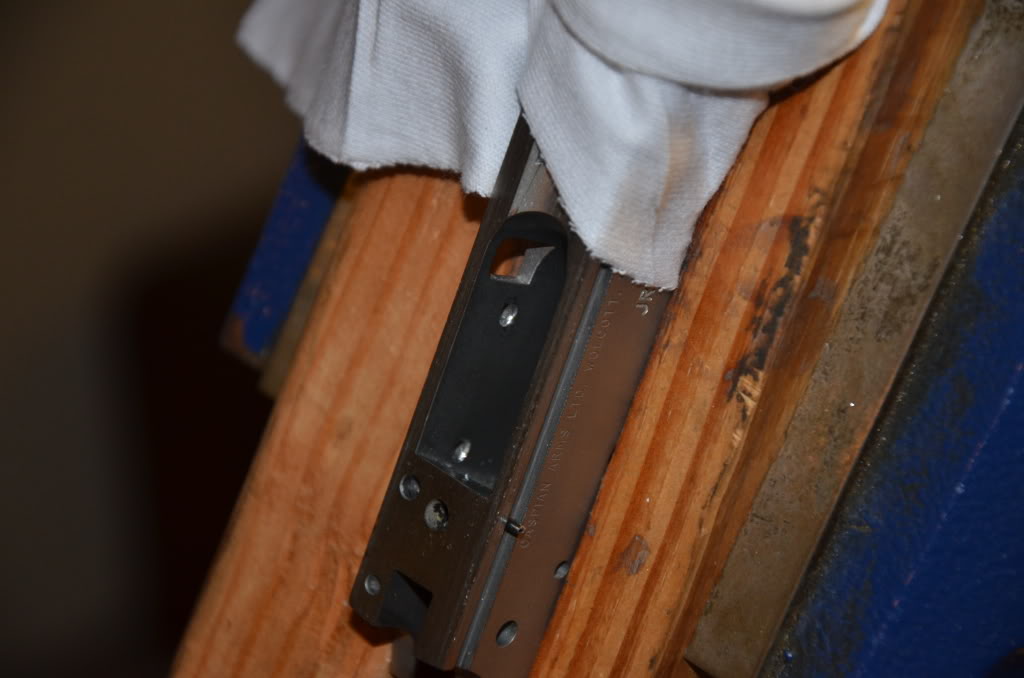
And a preview of the actual pistol size with slide seated properly on the frame….
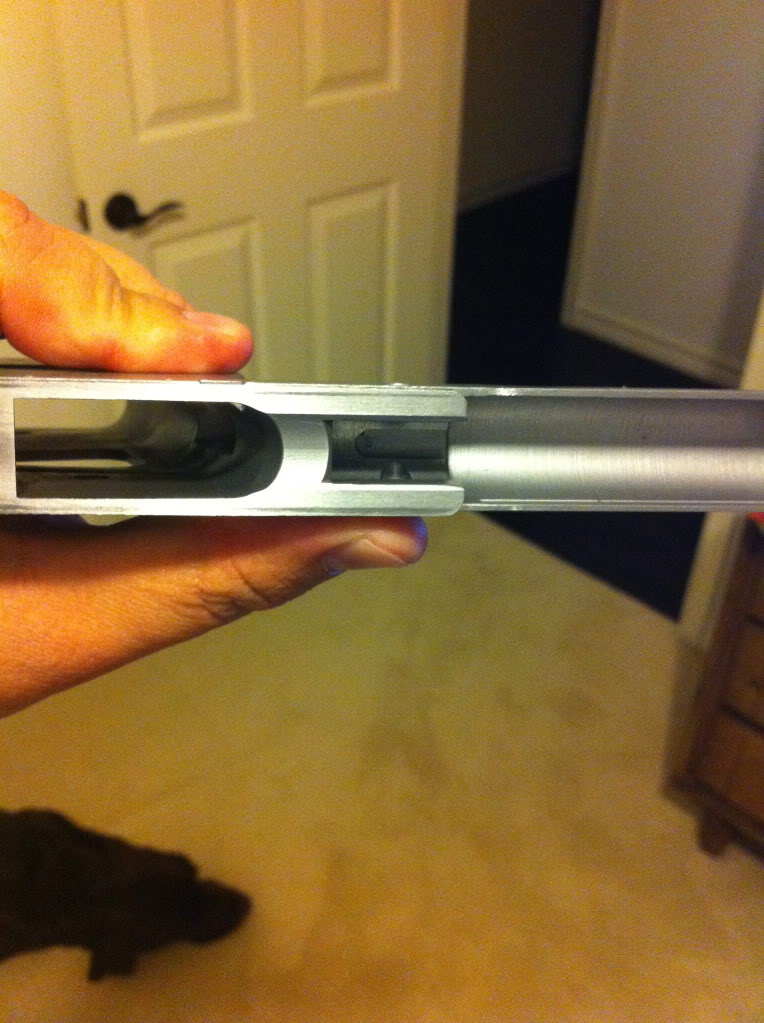
Caspian 1911 Slide and Frame
Tomorrow I’ll try to fix the scratches/galling if I can. Once that’s done, it’ll be time to order my barrel, link, link pin, and bushing!
 |
Get 1911 Caspian Slide on Brownells |
 |
Get 1911 Caspian Receiver/Frame on Brownells |
Frame/Slide fit…after the fact
Well, I took my frame and slide to my gunsmith today and confirmed what I had feared- galling and loose fit, which means I went to fast and ended up taking off too much metal from the frame. There are three ways to deal with this, two of which involve tightening the fit back up. Those are:
1.) Hammering and peening the frame rails to make the fit tighter, and probably also doing something similar to the slide. This is a temporary fix- after XX number of rounds fired the frame and slide will eventually return to their original state.
2.) Accu-rail installation, which basically includes the installation of a thin rail under the frame rail, along with removal of more material from the slide. This tightens the fit permanently, or until the accu-rail begins to wear. However, when this happens, wear only occurs on the accu-rail, which can be replaced, potentially increasing the life of the frame.
The third option is to leave it as-is and continue the build as planned, saving me roughly $230 and 3-4 weeks of time spent waiting on the install of the Accu-rail, or the cost of the tools to do the hammering and peening. The STI Trojan 5″ .45ACP pistol that I currently use in IDPA actually has more play, which means it’s more “loose” than my Caspian build. This means that even though I took off more metal than I wanted, I still did better than a factory build (at least that’s how I’m choosing to look at it).
When I put the barrel, bushing, guide rod and spring back into the STI, the lockup is incredibly solid and doesn’t move at all. This makes me think that for IDPA use, I could easily get by with my build without the Accu-rails or hammering/peening.
I’ve got a decision to make- I’m leaning toward option three, which is to continue as-is. Not only is this more cost effective initially, but it also may make more sense. Accu-rails are a spectacular enhancement to old, worn-out pistols and for those who are competing in Bullseye competitions. This pistol falls into neither of those categories- it will be used solely for IDPA competition, which means a likely maximum distance of 25 yards, with the majority of its use falling in the 5-15 yard range. Accuracy to the point of shooting holes inside of holes is not necessary at those distances, and I’m fairly certain that continuing the build as-is will allow me the needed accuracy of an 8-10 inch circle at 25 yards or less.
I definitely need to think about it though, and since I wasn’t planning on ordering the barrel for another week or two anyway, I’ve got the time built in. If I learned one lesson in all of this, it’s “don’t rush”and I plan to follow that rule for the rest of the build. Another thing I can think about- if I decide not to Accu-rail now, I can always do it later if the accuracy is not to my liking should I decide to continue as-is for now.
I’ll post again in a week or so after I either order my barrel or decide to ship it off for Accu-rail installation. Thanks for following along- your comments and suggestions are always welcome and appreciated!
Barrel Order
Well after much thought, several posts on multiple threads, and many conversations with close friends in the 1911 world, I decided to leave the slide and frame as-is and move on to the barrel fitting. The general consensus was that as-is, the fit is pretty dang good and the amount of horizontal and vertical play that is there should not become an issue at the distances I’ll be shooting for IDPA. Furthermore, if I do decide that I need a tighter fit, I can always go back and add the rails later. For now, though, it’s time to move on to the barrel. Before I can do that, I need to do some shopping.
I decided to order a few parts that will be crucial during the next phase, which is fitting the barrel and bushing to each other and also to the slide. I’ll also need some tools for this. I’ve listed the parts and tools that I’ll need below.
Parts I ordered:
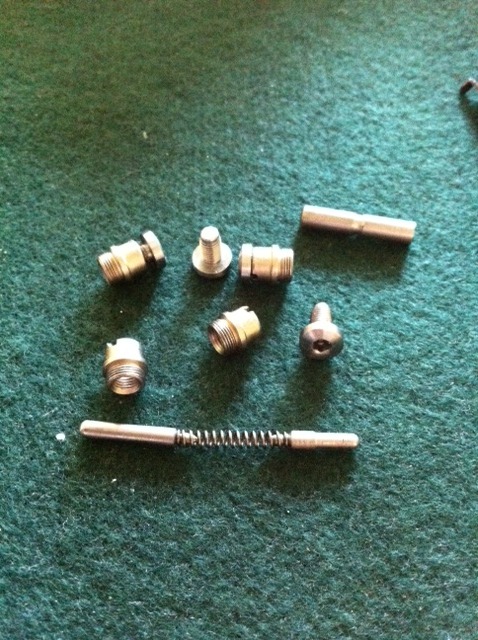
–Kart National Match Government 5″ 9mm barrel with a 1 in 16″ twist
-Ed Brown stainless standard (0.278) barrel link
-Ed Brown stainless barrel link pin
-Ed Brown stainless solid barrel bushing (oversize)
–Wilson Combat stainless slide release for .38 super/9mm
-Tools I need to order:
–EGW 1911 Hood length gauge
–Brownell’s 1911 barrel locking lug file
–Brownell’s 1911 barrel lug fitting kit
–Brownell’s 1911 barrel alignment block
-Nowlin link pin reamer
I actually already have the hood length gauge and barrel alignment block from a previous order, and I’m hoping to borrow the lug fitting kit and file from a friend. Those two items alone would set me back roughly $250, so for this build I would really like to save that money if possible and put it instead toward other parts that I know I still need (trigger, guide rod, sights, grips, mainspring housing, magazine well, hammer, sear, disconnect, ejector, extractor, plunger tube and related parts, and on and on).
So, the order for the parts is placed. The order for the tools will go out if I’m unable to borrow the items from a friend. If all goes well, I’ll be working on the barrel fit next week. Once I have the barrel fit to the slide, I’ll order the tools I need for reaming the chamber and getting the feed ramp fit to the frame. That’ll have to wait for now though- I’ve got plenty of work ahead of me fitting the barrel and bushing to the slide!
Barrel Fitting
Well, I have to say that MidwayUSA has yet to disappoint me when it comes to their speedy shipping. I received the barrel, bushing, link, link pin, hood gauge, and slide release on Friday and spent my Friday evening working on the installation. It took several hours, and some creativity on tool creation, but it was worth it. Now that I’ve done it, and know what tools I should have bought to prevent myself from having to “build” tools, it’ll go MUCH faster next time and probably even produce a better result. I am, however, very satisfied with the end result, especially for a first time go at it.
I began by taking my measurements- I needed to know the outside diameter (OD) of the barrel and the inside diameter (ID) of the bushing to make that fit, and I needed to know the OD of the bushing and the ID of the slide to get that to fit. I also needed to know the hood length and width of the barrel and the corresponding length and width of the slide where the hood will go. I’ve posted a picture below of my measurements and some photos of the way things “fit,” or more accurately, didn’t fit before I started working.
Measurements…
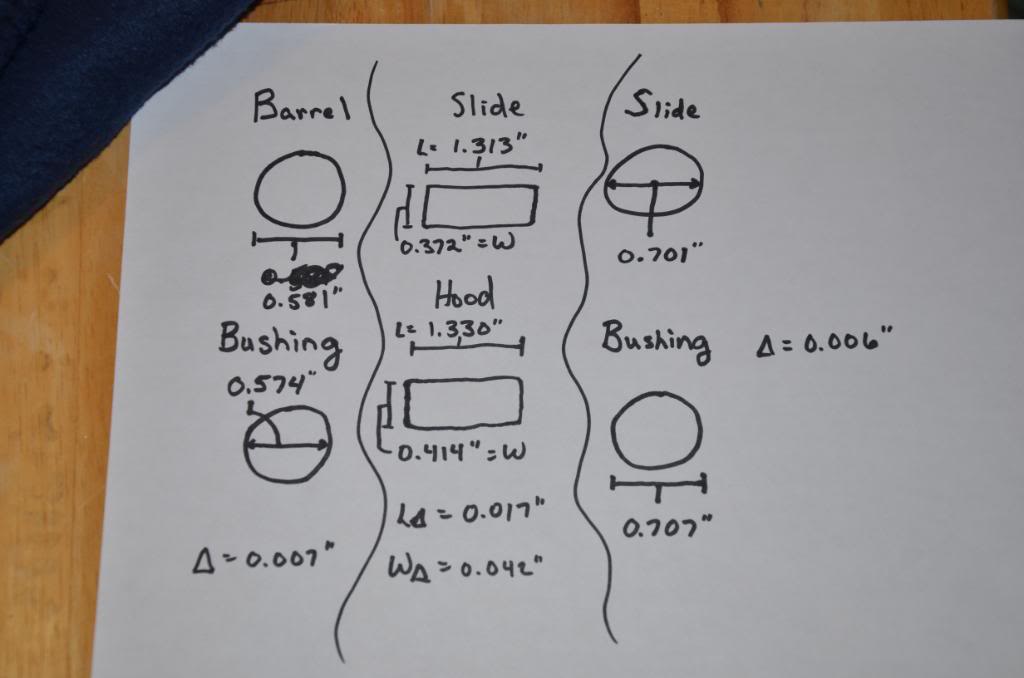
Barrel Fitting Measurements
Barrel doesn’t fit inside bushing…
Barre Doesn’t Fit Inside Bushing
Bushing doesn’t fit into frame…
Bushing Doesn’t Fit into Frame
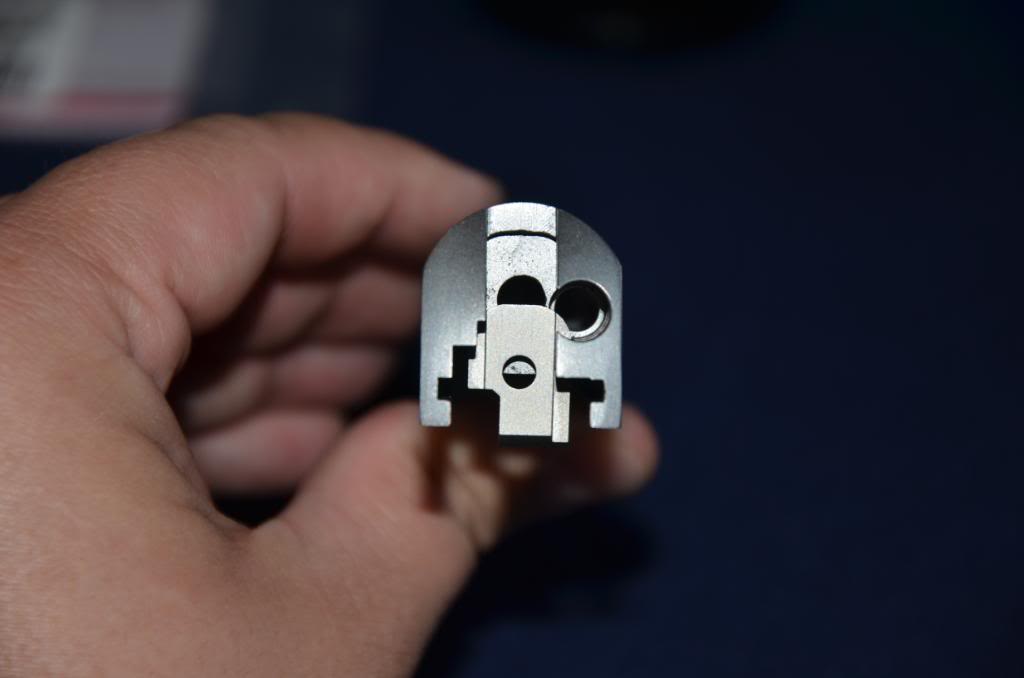
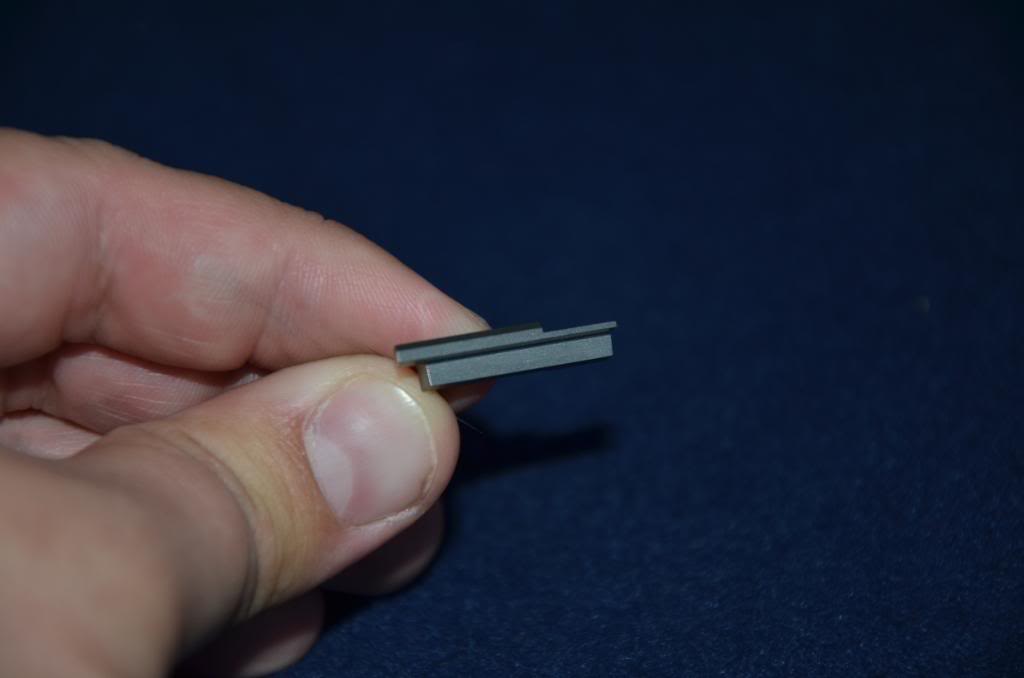
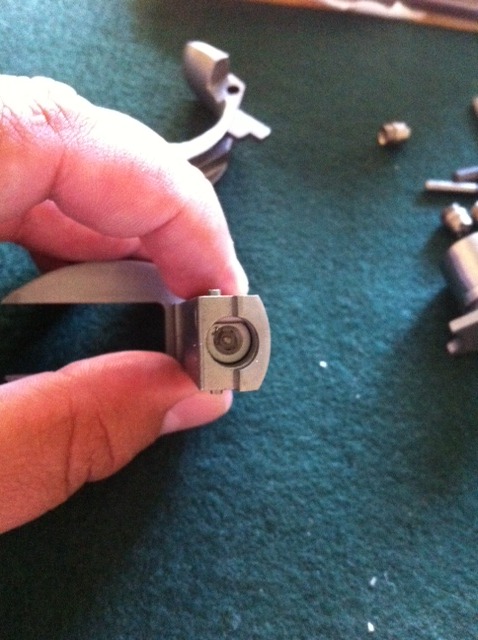
Slide stop doesn’t fit into slide…
Slide stop doesn’t fit into slide
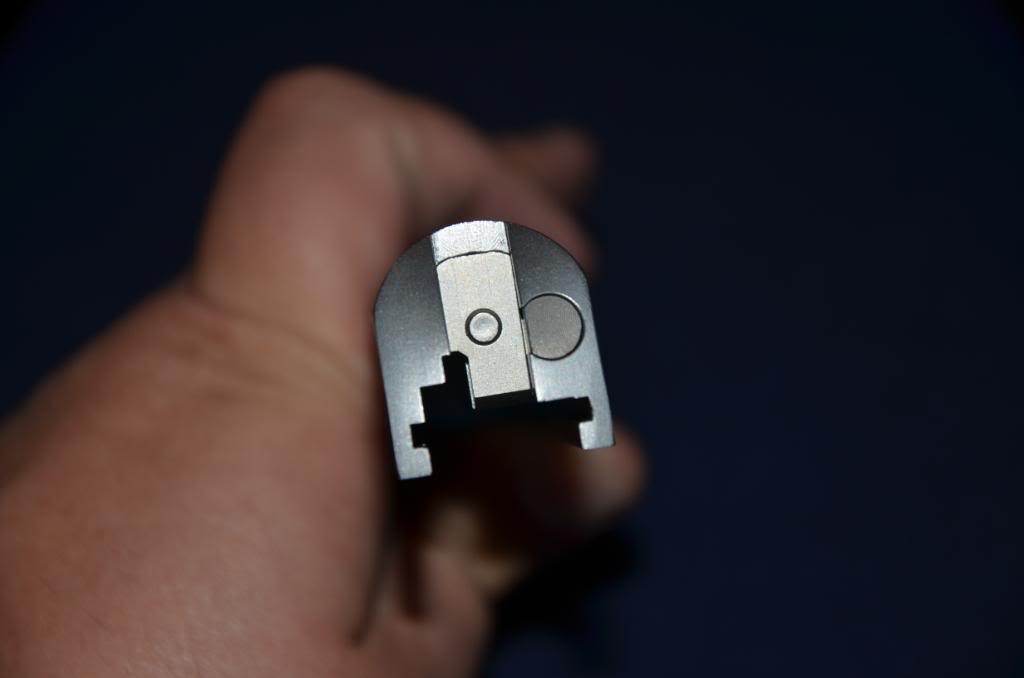
Another issue I ran into was that the barrel wouldn’t insert into the slide all the way back so I could see how off the hood was. After milling, the slide had some rough mill marks on the inside that prevented a smooth glide of the barrel, which caused it to hang up at the front of the slide.
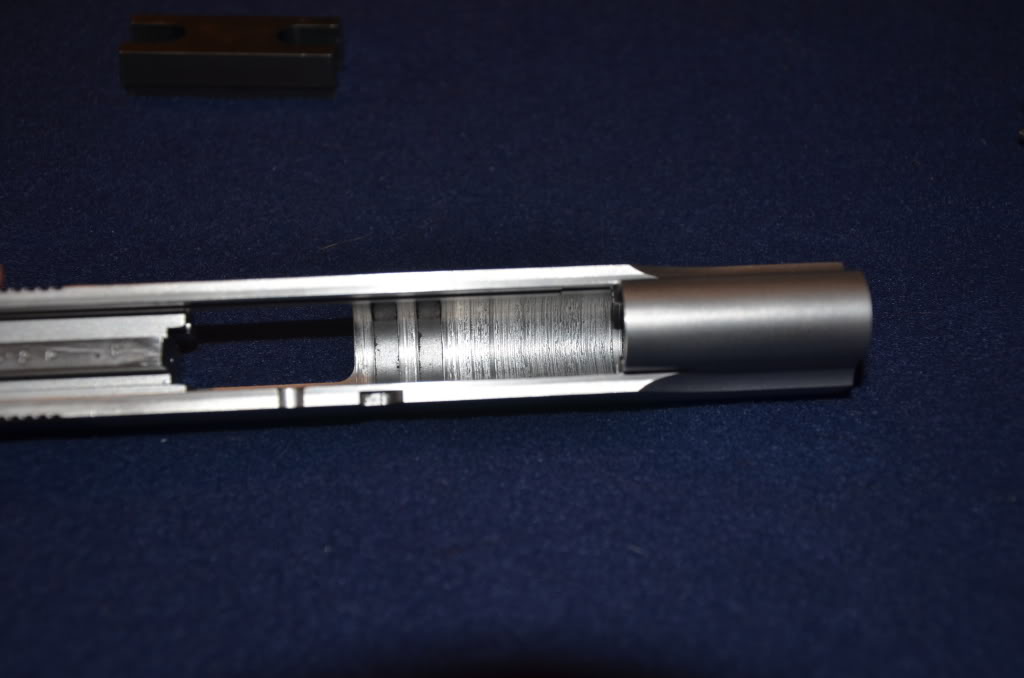
Caspian 1911 Slide
Brownells makes a tool that allows you to polish this area, but I didn’t have it, so I used a 5/8″ wooden rod from the local hardware store and taped some 220 grit sand paper to it. After about 5 minutes of smoothing, the inside of the slide was good to go and my barrel now glides free all the way to the rear of the slide.
To open up the inside of the bushing to allow the barrel to pass through it, I used the same wooden rod technique. I used a 3/8″ rod with the same 220 sand paper. This takes a while, and is a little difficult since the sand paper wanted to move around and tear, and would wear out before I reached my desired diameter. I decided to cheat a little here, and hooked up the sanding attachment on my dremmel tool to speed things up a bit. WARNING- go slow here, and measure often. I actually took off more than I wanted (where have I seen this happen before?) and the bushing to barrel fit isn’t quite as tight as I’d like it, but it’s tight enough and bushings are cheap so I can easily repeat this process if I want a tighter fit with a new bushing.
Now that the barrel and bushing are playing nicely together, I had to get the slide to join the party. I didn’t want to modify the slide though, since replacing anything would likely mean the bushing as it’s cheaper and wouldn’t require me to modify all of my other parts as well. So, I began filing down the OD of the bushing using a Nicholson flat file and sand paper. I had a lot of metal to take off here, so I also called into play the use of my bench grinder, which works remarkably well and fast. Again, though, be careful and go slow, taking measurements often. I also took a break before getting started here, because tired hands are not what you want when dealing with the bench grinder. Steady, even turning of the bushing will allow a smooth removal of the metal, and DON’T make the mistake of not rotating the bushing or you’ll end up with flat spots.
When I got it close, I finished with a quick polish using the sand paper and my bushing now fits easily into the slide using moderate hand pressure, but requires a wrench to turn it. Perfect.
1911 Fitted Barrel
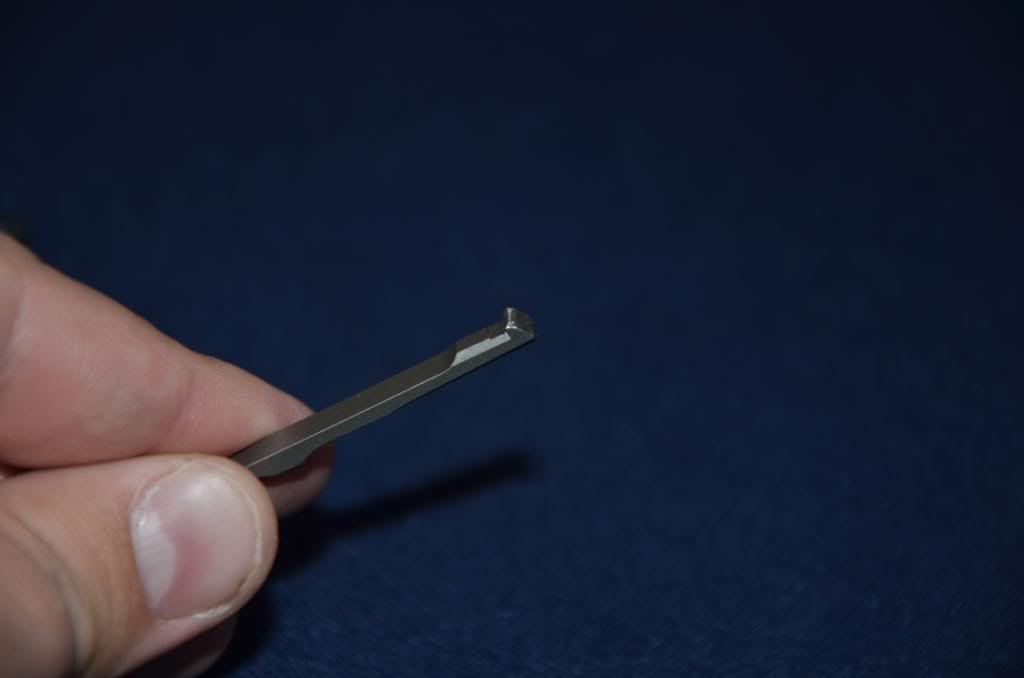
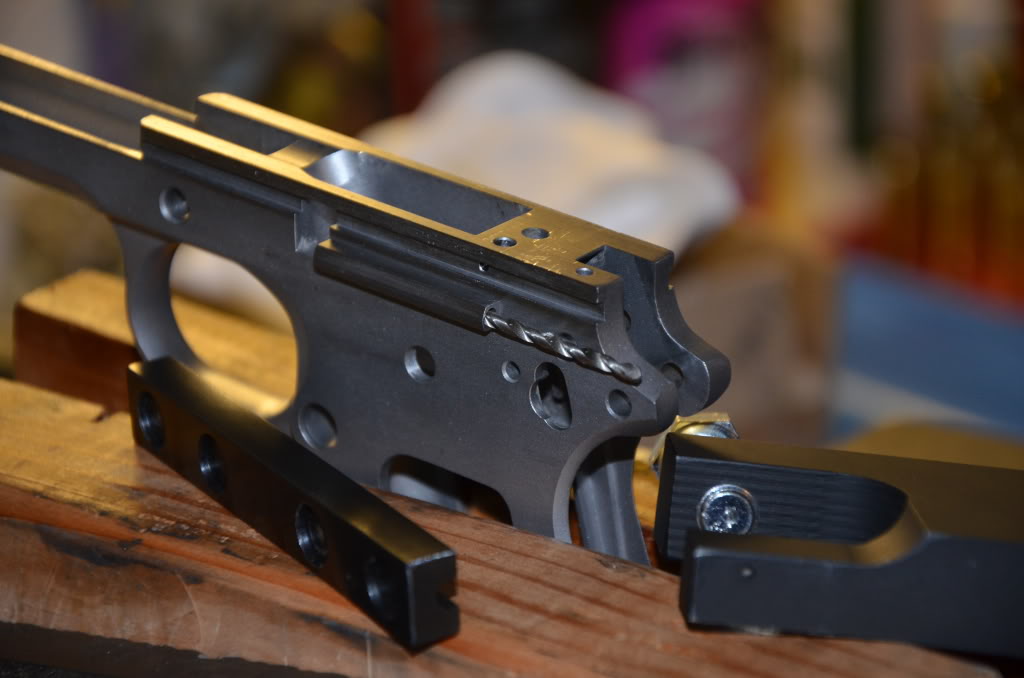
Now the hard part- fitting the barrel hood and lugs to the slide. I began by lining up my barrel inside the slide using the Barrel Alignment block I ordered from Brownells. This ensured that I had the barrel perfectly straight in the slide. I could see that I needed to remove metal from the right side of the barrel hood to allow it to slip into the slide and make contact with the breach face. I placed the barrel in my vice, with 1″ thick wood “buffers” so I wouldn’t scratch it. A file is all that was needed here, and I removed the barrel and re-measured after every 10-15 strokes at first, and after 5-10 strokes as I began to get closer. I then did the same on the other side of the hood, which didn’t require as much filing and went much faster.
Now that the barrel hood fit and contacted the breach face, I needed to remove some of the length as the barrel hood was about 0.027″ longer than the space in the slide. Again, I used the vise and file and took my time. Once finished, I checked for lockup and it was VERY tight but clicked into place. A couple more strokes off the length, an some filing of the lug recess on top of the barrel, and I was good to go. The final step on the barrel was to chamfer the hood to allow for smooth lockups and prevent scraping of the surrounding slide contact areas. Now it fits nice and snug on lockup and easily moves when released.
Fitting Barrel Hood and Lugs to the Slide
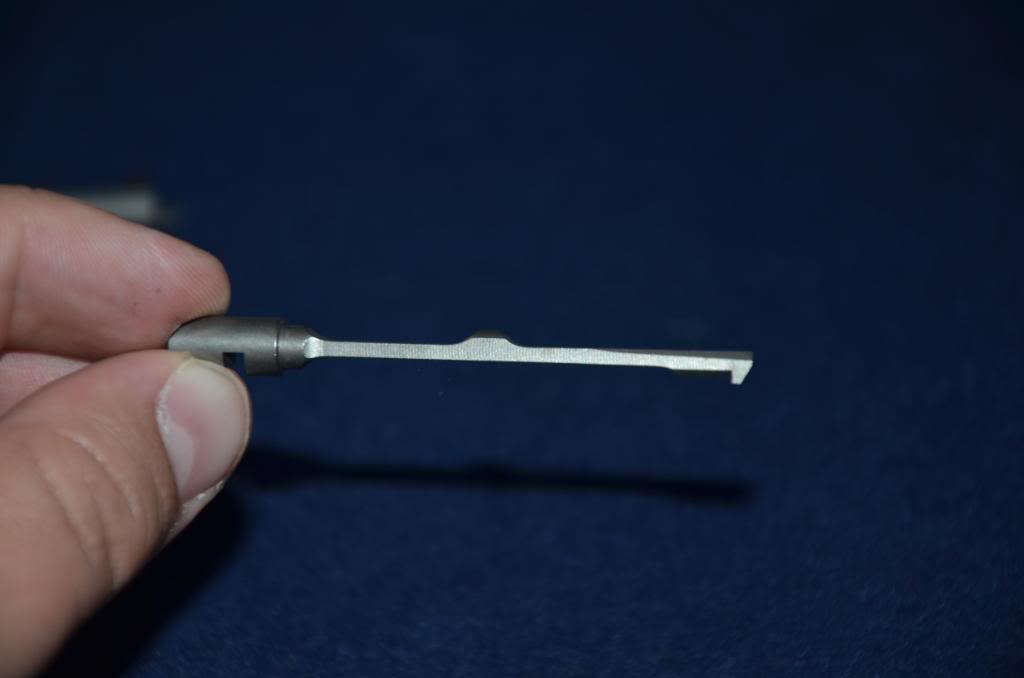
Next, I had to fit the link and link pin, which meant fitting the lugs on the bottom of the barrel. I used the Brownells Lug Fitting Kit for this, which I was lucky enough to borrow from a friend and save the $170 or so to buy it myself. It’s an easy tool to use, and now that I know I like it, I’ll probably buy it for my next build. It’ll also come in handy anytime I need to fit a new barrel to any 1911 I already have or my friends have. The kit makes it very easy, and after about 20 minutes of following the instructions and cutting the lugs to fit, I was ready to smooth out the cuts with a file and add the link and link pin. Smoothing the cuts is important- if you don’t do it there will be a slight “hump” in the lug and the slide stop won’t travel smoothly, which will prevent the slide from unlocking to cycle a new round. It takes about 10 seconds with a small file to smooth everything out.
The link pin was slightly oversized to the barrel, although it fit well in the link. I used a carbide cutter bit on the barrel pin hole to open it up just a hair. Some tapping with a hammer pushed the pin through for a snug fit that will only come undone with a hammer and punch. Perfect.
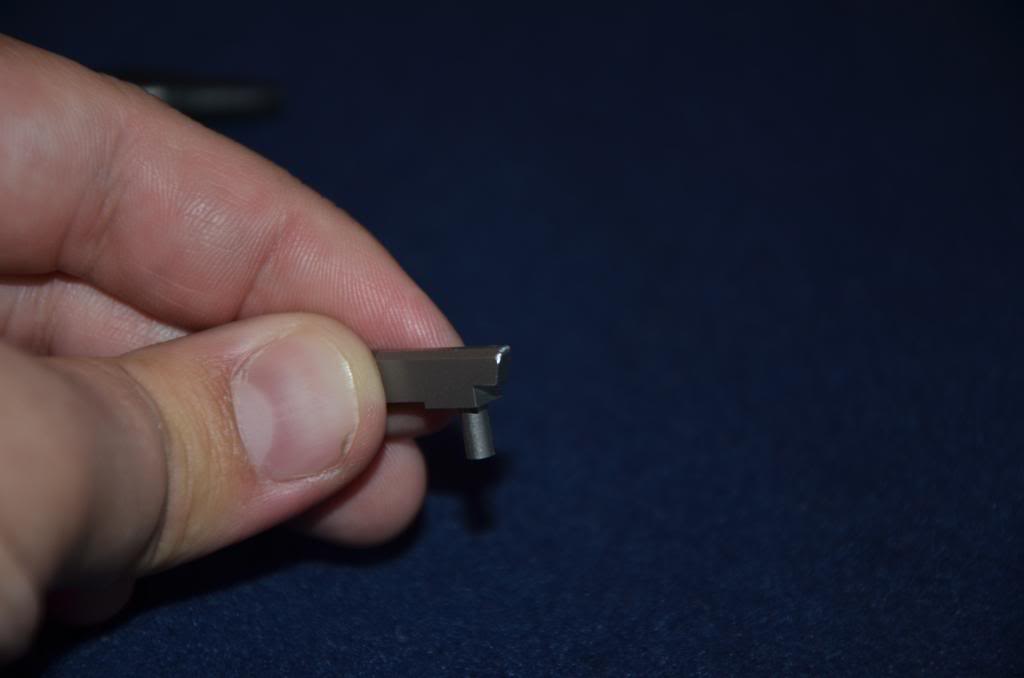
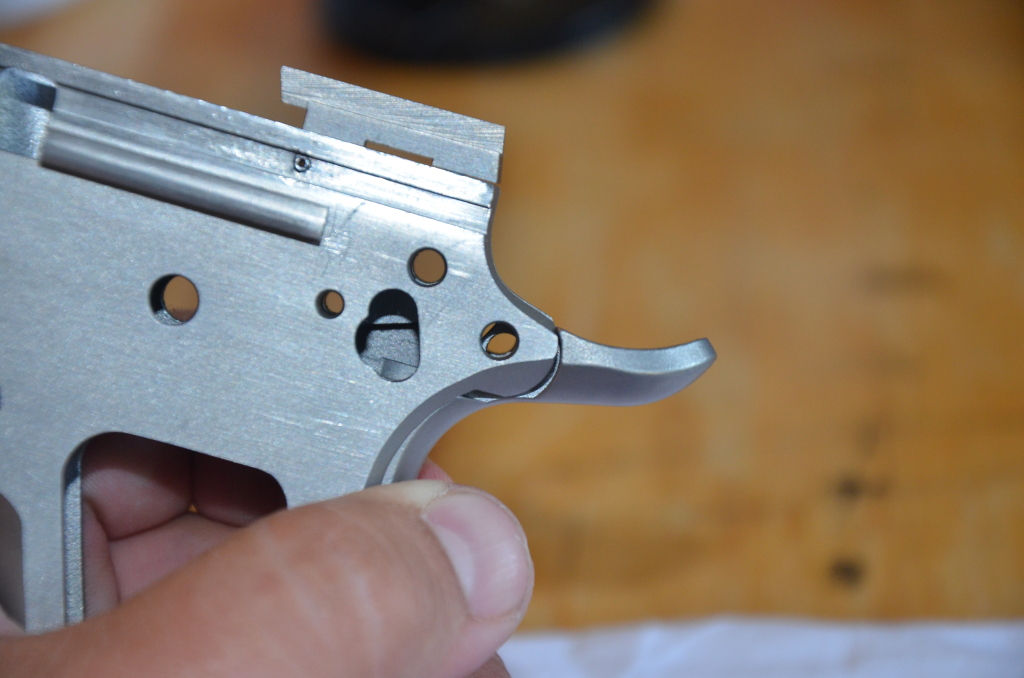
Finally, since the slide stop wouldn’t fit in the frame, I took the sand paper approach and trimmed down the diameter of the slide stop. It now goes through the frame and link as it should, and holds everything in place.
fitting the lugs on the bottom of the barrel
I still have a tiny amount of overhang on the slide/frame rear, which I’ll need to clean up during the “cosmetic” portion of the build. Everything works smoothly and locks up tight for now, so this portion of the fitting is complete.
1911 Slide Frame Rear
Next steps- I need to finish the slide by adding the firing pin and spring, firing pin stop, extractor, recoil spring, guide rod, and recoil spring plug. Oh, and sights. I also need to fit the ejector to the frame, along with the plunger tube assembly, magazine catch/release, grip bushings, mainspring housing assembly, grip safety, trigger, hammer, sear, disconnect, leaf spring, and all associated parts. Lots still left to do.
I think my next order to Brownells will be for the ejector and mag catch, and I happen to know that my wife is looking at my “wish list” saved on Brownells website for some Valentine’s Day gift ideas! That means I’ll be holding off ordering for a couple of weeks until I know what she bought.
Thanks for following along- see you in a week or so!
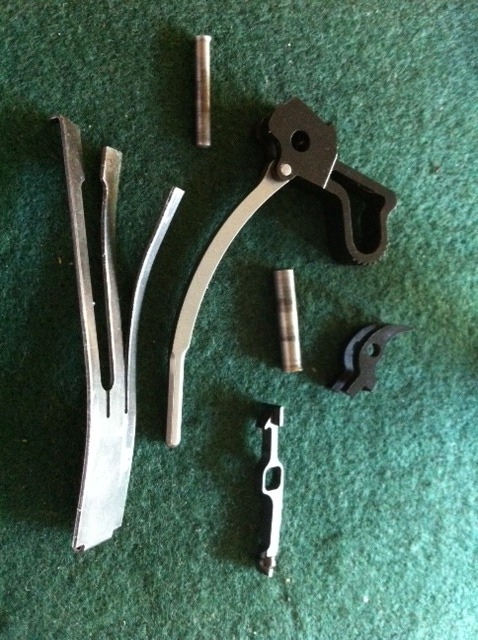
Extractor, ejector, and firing pin
Well, since my wife used my Brownells online “wishlist” to buy parts for my Valentine’s Day present, it wasn’t very hard for me to figure out what she ordered. So, I ordered some other parts that were still needed, which means that
I had some more fitting to do this week.
The additions are listed below:
–Extractor
–Firing pin stop
–Firing pin and spring
–Ejector and pin
When the parts arrived, the only things that fit were the firing pin and spring. The other parts were all either oversized, needing just a bit of tweaking to fit, or were slightly sharp and needed some tweaking to help functionality.
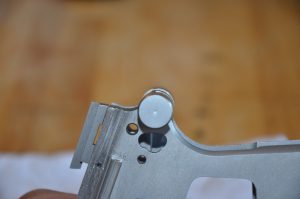
Here’s a photo of the firing pin stop- it wouldn’t quite go in all of the way, at first.
1911 Firing Pin Stop
1911 Extractor
Using a loaded round to allow the proper weight and dimensions for testing, I tested the fit and strength of the extractor. The fit wasn’t perfect, as some of the dimensions of the hook were too large and contacted the case without getting a good hold of the lip. Also, the extractor wasn’t quite tight enough, so I would need to increase the tension a bit for a better hold. Below is a photo of the weak tension. REMEMBER- don’t have your firing pin installed when testing this…you don’t want the pin to accidentally strike the primer.
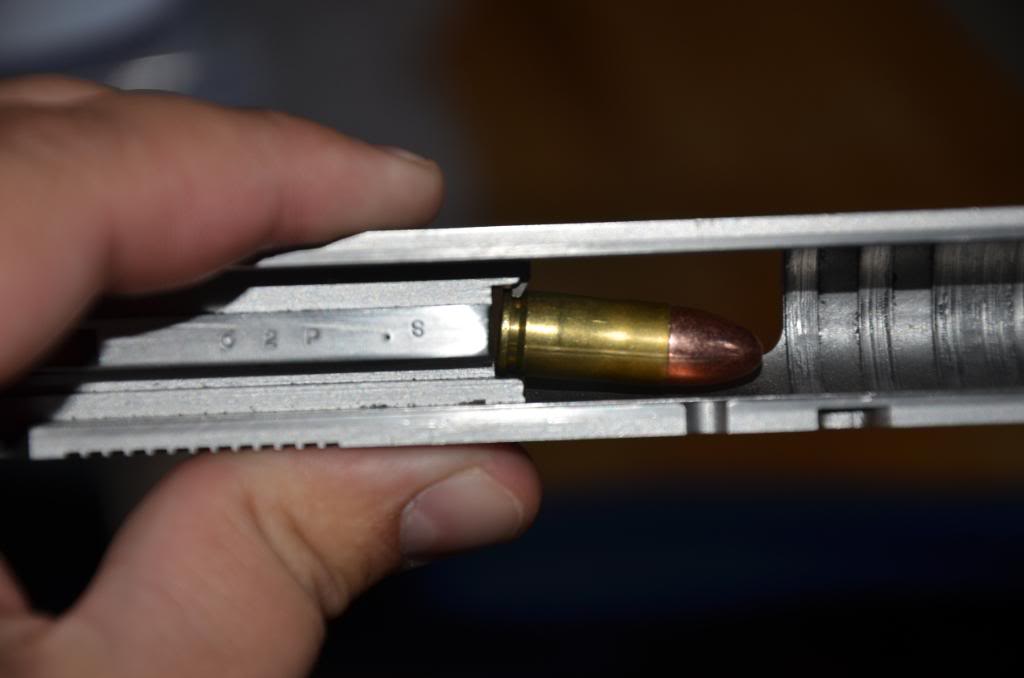
1911, Test Fit and Strength of the Extractor
I strengthened the tension of the extractor by inserting it halfway into the slide, and bending by hand in the direction of the hook. Had it been too strong, I’d have bent it the other direction (toward the outside of the slide). No picture, but it hods the loaded round well and does not release it even after shaking.
With the tension where I wanted it, I shaped the extractor a bit to smooth out the sharp edges to allow more consistent and reliable grabbing of the case. The bright spots are where I filed out the edges.
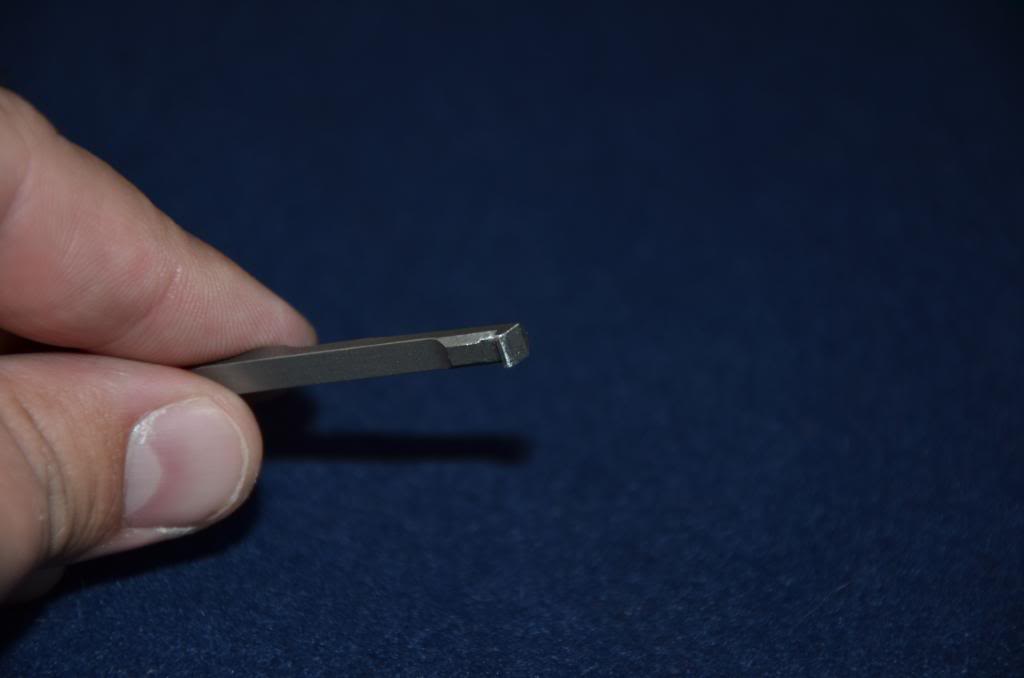
1911 Extractor
1911 Extractor
Installation of the firing pin, spring, stop, and extractor shows that I still need to do a little more “finishing” later when the build is complete. The extractor is slightly recessed into the slide- I’ll want that to be flush, and this should be accomplished when blending the fit where the slide slightly overhangs on the frame. The firing pin stop fits well for now, but may need to be trimmed on top a bit when I make my cuts for the rear sight. We’ll check that later.
Installation of the firing pin, spring, stop, and extractor
The ejector fit nicely into the frame, but the top was still a little rough from machining, so I would need to smooth that down to prevent rubbing on the slide. I also wanted to address the sharp edges on the front of the ejector where it would contact the spent case.
1911 Ejector
After smoothing- it’s hard to see, but the machining marks on the top are smooth. I used the granite surface plate and 220 grit sandpaper…just a few strokes did the trick. To radius the edges, I used a small flat file and just kissed the sharp edges. This should prevent the ejector from “grabbing” on to any nicks or imperfections in the brass casing, and allow for a consistent ejection out of the right of the slide.
1911 Ejector
Finally, to finish installing the ejector, I needed to drive the ejector pin into the frame. This was somewhat difficult, as I didn’t have a very good drill bit. After placing the ejector in place on the frame, I used a 1/16 bit to try and drill through the post on the ejector to allow the pin to pass through and hold it in place. Here’s the part where I tell you about buying quality tools- the bit I had broke. So did the replacement. Fortunately, I had a 3rd bit to break as well. Yep, 3 bits, and still no successfully drilled notch in the ejector.
I did, however, have markings on the location of the ejector’s front post that needed the notch, so I removed it from the frame and placed it into a vise. I then took a small triangle file and began to make a notch in the front post that would allow the pin just enough room to pass through the hole in the frame. Success. I was so focused on getting the pin into the frame that I forgot to take a picture of the filing process- my apologies, but trust me when I say it worked. Without that notch in the ejector post, the pin will not go in. The pin did protrude slightly from the frame on both sides, so I used my Brownells frame/slide file to make it flush to the frame. Here’s a pic of the final result:

1911 Fitting Final Result
And here is the final fit from the back:
1911 Fitting Final Result
The fit was actually very good- very thin lines, so when I’m ready to blend the slide to frame fit to get rid of the overhang, everything should end up sitting very nicely and look pretty flush.
I’m planning to be “surprised” by my wife with a plunger tube, magazine release, and plunger tube staking tool in a few days, so hopefully I’ll be able to get to the installation shortly after that. Until next time…
Plunger tube!
Wow- been a while since my last post. Things have been busy, but I finally got around to installing the plunger tube I received a couple of weeks ago. To do this, I needed a couple of special tools, which I ordered from Brownells. They are listed below:
–Plunger tube staking tool
-1/8″ tungsten carbide ball cutter
I also had to remove the ejector, as it was in the way of the plunger tube staking tool and I wouldn’t be able to stake down the rear post without first removing the ejector. I just used a punch and drove the ejector pin only as far as I needed to be able to remove the front post on the ejector. You can see the pin hanging out of the right side of the frame in the picture below, which also shows the unchamfered holes that will eventually contain the posts for the plunger tube (inside the frame). You can also see how dirty the frame is since I haven’t degreased it completely…and some scratches. Those will be cleaned up, I promise!
1911 Frame
I used the 1/8″ ball cutter to chamfer the holes on the inside of the frame…
1911 Inside_the Frame
…then using the staking tool, staked the posts of the plunger tube. I also used a drill bit here- I placed it inside the tube to keep it from collapsing just in case the tool was smaller than the tube. Worked great!
Staked the posts of the plunger tube
I then checked to make sure the magazine was still able to slide in and out of the frame unobstructed by the newly installed plunger tube. In the picture below, you can see the follower from the magazine sticking up out of the frame.
Follower from the magazine sticking up out of the frame
Next I installed the plunger spring, slide stop pin, and thumb safety pin. There was a lot of positive resistance and the thumb safety functioned well, although it’s a little “too” positive. I’ll need to polish the surface of the thumb safety to allow for a more smooth “on/off” engagement. I’ll need to do the same for the slide stop, as it’s a little snug and difficult to install also.
installed the plunger spring, slide stop pin, and thumb safety pin
I went ahead and removed the safety and slide stop so I can polish them over the next couple of days. I also reinstalled the ejector. I’ve now reached the point where I have a decent amount of spending to do before I can really do any more installation- I need the following items:
–hammer
–sear
–disconnect
–sear spring
–hammer strut
–grip safety
–trigger
–magazine release
–mainspring housing and magazine well
–grip screw bushings
–grip screws
–grips
–sights
I don’t need sights just yet, and I actually have the springs and pins needed to complete the installation other than what is listed above. I have the magazine release and also the Ed Brown Memory Groove grip safety I also have- but I need to do some fitting as the frame is just a couple thousandths too large…I’ll need to order the tool from Brownells to do that installation also. The remaining items are still needed to work together to test the function of trigger pull, and since I have an IDPA match coming up in a couple of weeks that I need to practice for, it’s going to be a couple of weeks before I can order them. I’ll try to get them ordered and get this thing built soon…thanks for reading!
Progress!! (Finallly)
Wow- it’s been a long time since I’ve been able to do any work on the 1911. I got sidetracked with other projects such as my 1976 Wingmaster restoration and home remodeling efforts, as well as practicing for and attending the Texas State IDPA Championship. Needless to say, I’ve been pretty busy and haven’t had time to order the parts I need to finish the 1911 build.
That actually worked out in my favor. I have had, for quite some time now, all of the parts I need to finish with the exception of the hammer, sear, and disconnect. I was looking at a Cylinder and Slide match set, but it was back ordered and it was also about $130 that I didn’t really want to spend at the moment, so I kept putting it off. Then I went to the Texas State IDPA Championship. I didn’t do as well as I wanted to (4th place, SSP Sharpshooter), but I had a lot of fun. The best part of the event came during the prize table drawings…of all the pistols, gift certificates, optics, etc. that were on the table, my name was never called. Then, with only a few items left, we were down to a couple of gift certificates and a random box of parts that everyone kept passing by. That random box of parts turned out to be a VERY NICE hammer/sear/disconnect set donated to the table by SVI….then my name was called and that VERY NICE hammer/sear/disconnect from SVI became mine! I now had no excuses- I had all of the parts I needed, so the build needed some long overdue attention.
I didn’t take any pictures of the trigger or magazine release fitting, but it was pretty straight forward. Just a little filing and sanding until they fit in the appropriate places- 30 minutes of work.
The beavertail safety took a while. As you can see from the photo below, it wouldn’t fit immediately and would require some work to be done to the frame, as it was just a little bit proud and wouldn’t allow the beavertail safety room to line up with the thumb safety hole.
1911 Beavertail Safety
I installed the beavertail safety jig from Brownell’s and as you can see, there wasn’t much material to remove. Smooth, slow strokes with a file did the job.
1911 Beavertail Safety
After the filing…
After the filing
Next I installed the beavertail safety- it was still snagging on different areas and it would not depress completely into place, so using a blue marker I colored up the sides of the safety and figured out the rough areas to file down and smooth out. Here you can see the before and after, where it went from unable to rest in the frame to being able to fully move in and out of the frame.
Fitting 1911 Beavertail Safety
Fitting 1911 Beavertail Safety
Next I moved on to the thumb safety. I had previously made sure it would fit in the frame, but now I needed to check the fit with the hammer and sear installed. I installed the hammer/sear/disconnect and then attempted to drop in the thumb safety. I don’t have any pictures of this- I got frustrated that it wouldn’t fit, and began filing away at the spur on the back of the thumb safety. Long story short, I filed too much metal away (read as: “I got in a hurry and jacked it up”) and the safety no longer does its job.
This was actually a blessing in disguise for three reasons- first, I learned the lesson (again) to always go slow. Second, I learned how the thumb safety interacts with the hammer and sear. Third, I was never really impressed with the construction of the ambi-safety. The joint where the right and left sides met seemed flimsy and weak, and was a point of concern for me since the day I received it. I decided to replace it with a right hand only thumb safety, and am very happy I did- it seems much more sturdy and solid (and it required less fitting).
With the safety fitted, I took out all of the small parts and gave them all a good cleaning and some oil, then decided to reinstall of the action parts, which you can see below (hammer, sear, disconnect, hammer pin, sear pin, and sear spring.
1911 Action Parts
These were then joined by the mainspring housing, which I had previously setup.
1911 Mainspring Housing
Next, I added the pin to hold the mainspring housing in place, installed the plunger tube spring and pins, reinstalled the thumb safety, and added the grip bushings, grips, and grip screws. A tip for the grip bushings- install the screws into the bushings BEFORE installing the bushings into the frame. then use the allen wrench or flat head screw driver you would use on the screws to install the whole assembly to the frame. Once it’s as tight as it’ll go, back the screw out. This is much easier than trying to use a flat screw driver to install the bushing by itself.
1911 Bushings and Pins
And finally, the puzzle with all of the pieces (except for the sights) in place. That’s a Wilson Combat Elite Tactical Magazine inside the magazine well. The grips are a “skateboard tape” type grip that I got for IDPA use…I’ll probably get some nicer grips down the road also.
1911 Project Progress
This project is not even close to being finished! Every single part needs to be smoothed and polished. The pistol, as-is, cycles pretty rough. But, it does cycle, and it does chamber my dummy rounds. From here, there is a massive amount of tweaking to make it something that’s actually useful, and even more work on the aesthetics to blend the edges, checker the frame and mainspring housing, and make it “pretty” in general.
Progress has been made, though….FINALLY! Hopefully over the next month or two I’ll make even more progress and get this thing IDPA ready. Thanks for following along!

Wow, Vitaly. What a project! I just worked on a slide stop for my 1911, and it was quite a chore! I am truly impressed with your work. I have had my (working) 1911 since 1985, or so, but it is now needing to be refurbished, partly from parts wear, and partly from some of my butchery. I have a small collection of magazines that don’t work, in one way or another – ftf’s, no hold-open – trying to figure out whether to make jewelry of them, or just throw them away, Ha!
WHAT A IMPRESSIVE PROJECT OF YOURS CAN U SEND ME THE DIY TEMPLATES PLEASE