
Remington 870 Wingmaster Restoration Project
The Shotgun
Remington 870 Project by JP
Several months ago I changed jobs, and in doing so, ended up adding an entirely new area of north Texas to my daily routine. Early on, I would take my lunch break and drive around the surrounding areas to “explore” not only lunch options, but also to just familiarize myself with the local community and businesses that were now nearby. One day after lunch I was driving back to the office and came across a small pawn shop with a sign that was actually bigger than the building itself. I went inside. They had the typical pawn shop items available, which meant that they didn’t have much that I was interested in buying for myself. However, they did have an old Remington 870 Wingmaster tucked away in the corner….I had to take a look.
It was old- I didn’t write down the serial number to research later, but I knew by looking at it that it was old. I actually dismissed it after holding it for only a couple of seconds. My lunch break was getting longer than I’d wanted, so I needed to go.
A couple of weeks later, I stopped in again to see if they’d acquired any new items. Nope. The 870 was still tucked away, so I took another look. It was still old. It had rust on the receiver and barrel. The rust wasn’t horrible, but it was there, and as dirty and grimy as the rest of the gun was, I figured there was likely more rust in other areas I couldn’t see without taking the gun apart. I handed it back to the shop manager and left.
A couple of weeks later, I stopped in again, and yes it was still there. I held it again, and closed my eyes so I wouldn’t see the dirt, grime, and rust. I cycled the action- smooth as any Wingmaster I’d ever held, and much more smooth than any new 870 Express I could buy off the shelf of a large store. The gun felt good in my hands. It was familiar, solid but not heavy, and I was beginning to like it. I opened my eyes and looked at the price tag- they were asking almost as much as a new Wingmaster would go for…I handed it back and left. Afterall, I had just recently placed an order for my 1911 frame and slide for a custom build I was going to do (see my other blog- Project 1911: Building a 1911 from Start to Finish), and I didn’t need to spend money on an old shotgun that needed restoration. Plus, Christmas was only a couple of weeks away and surely someone would come buy this for their kid as a first shotgun.
About a month later….yep, still there. And it was there again a month after that. I was pretty far along on my 1911 build at this point, and I was beginning to see the end as I only had a few more parts to acquire to make it functional. Then of course, I would need to do the cosmetic work, but the end was in sight and I was beginning to wonder about what my next project would be. One weekend in mid-February I began looking online at 870 options to either build up a home defense gun or do a restoration. It could be fun, right?
I went back to the pawn shop the next week. The 870 just sat there, so I picked it up again. I rubbed some of the rust with my thumb. It came free. Maybe this wasn’t going to be as bad as I had originally thought. Maybe a good cleaning and a little rubbing of the rust was all that was needed to bring this old gun back to life. No, it would need to be refinished- the bluing was worn in some areas so even if the rust came free that would need to be addressed, and the buttstock was cracked and would need replacing.
They hadn’t changed their price tag, which is probably why it was still sitting there after all of this time. I had a pretty good idea of what the old Wingmasters in decent shape were going for online at auction sites, which was around $300 plus shipping and FFL fees and any restoring costs. I knocked a bit off of that and made an offer. I wouldn’t have to pay shipping or FFL transfer fees if they accepted my offer, so I’d be better off than buying one online, even if I did need to do some slight restoration. They took my offer, and although I was $225 lighter when I walked out, I had a new old shotgun to work on. Next step would be to get it home and figure out just exactly what I had bought and what I was going to need to buy to make it a great gun again. I took pictures of the whole effort.
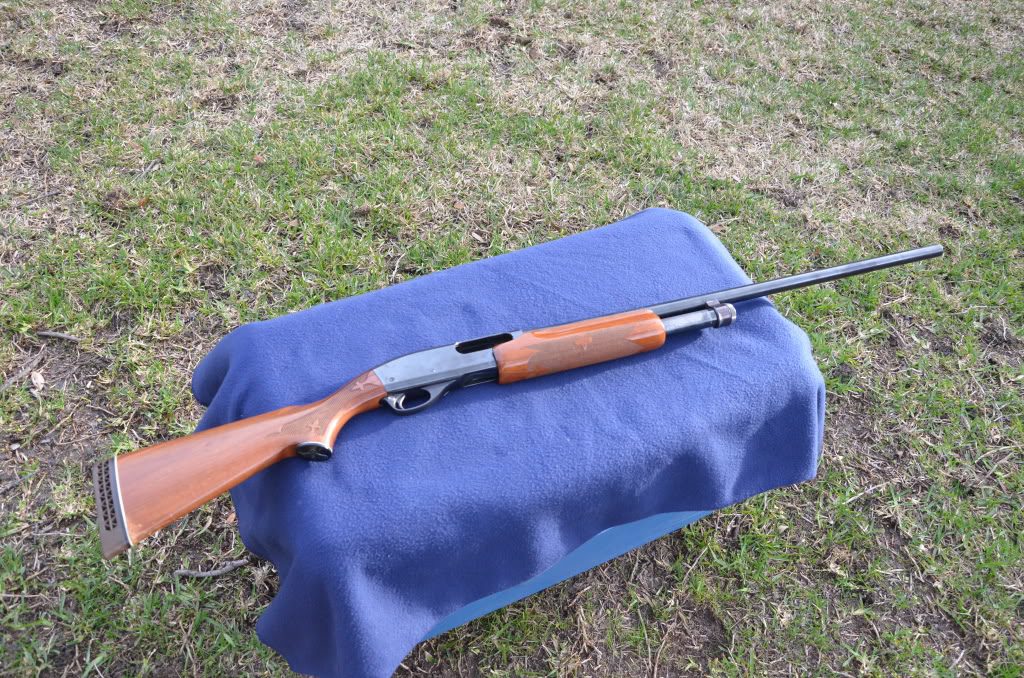
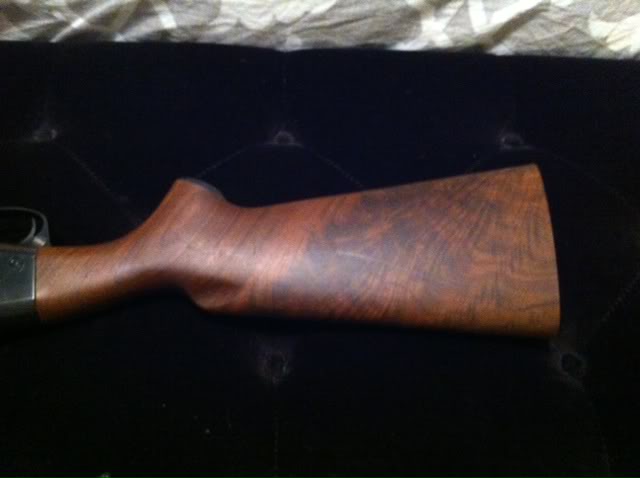
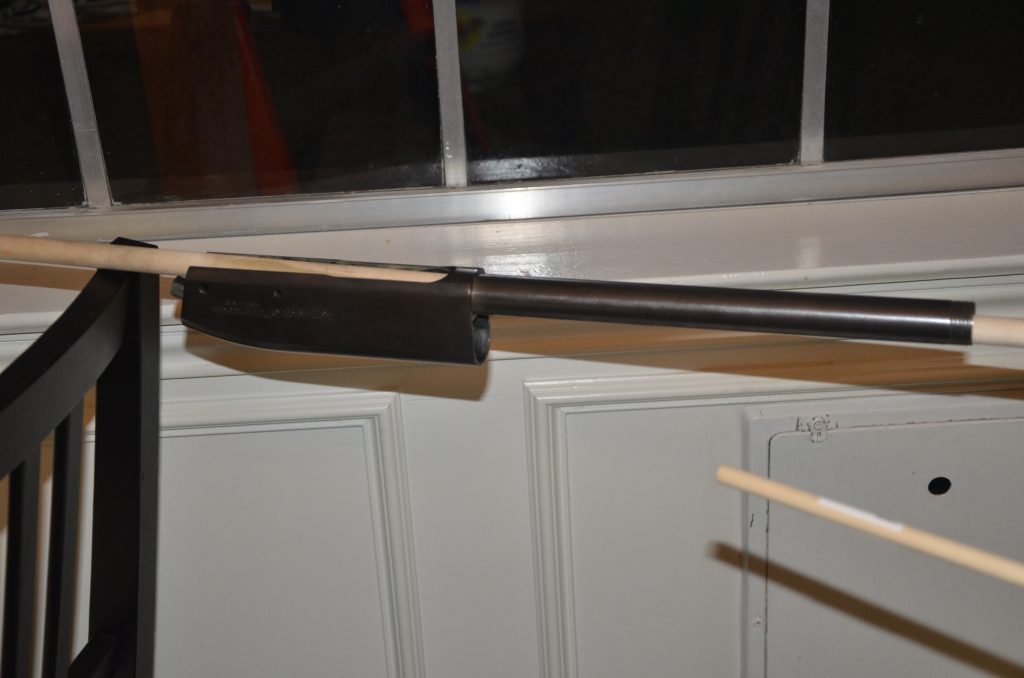
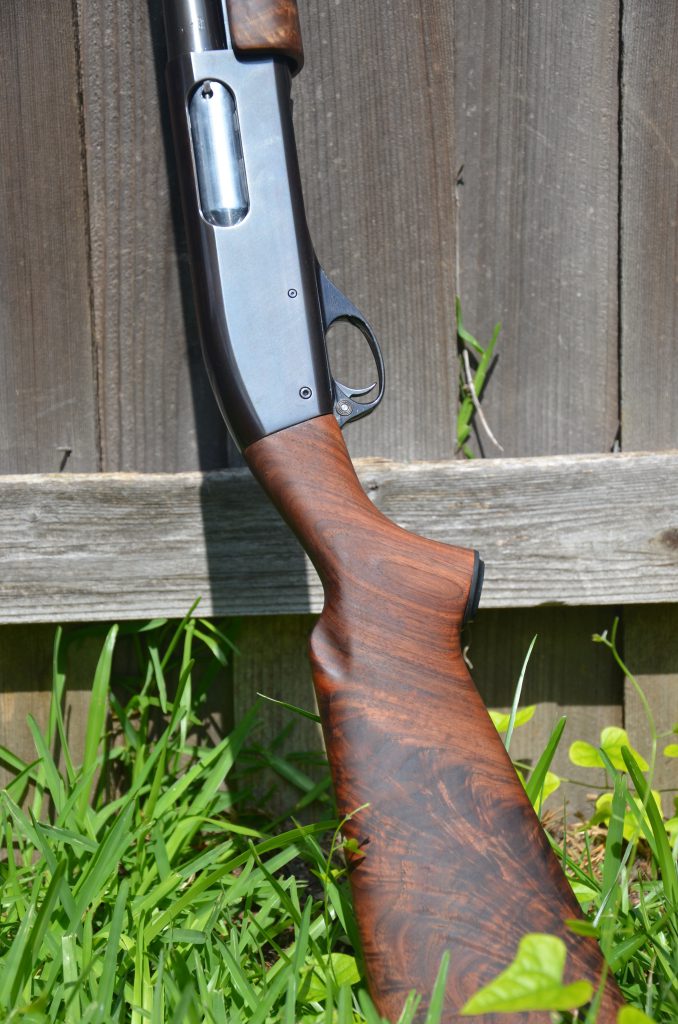
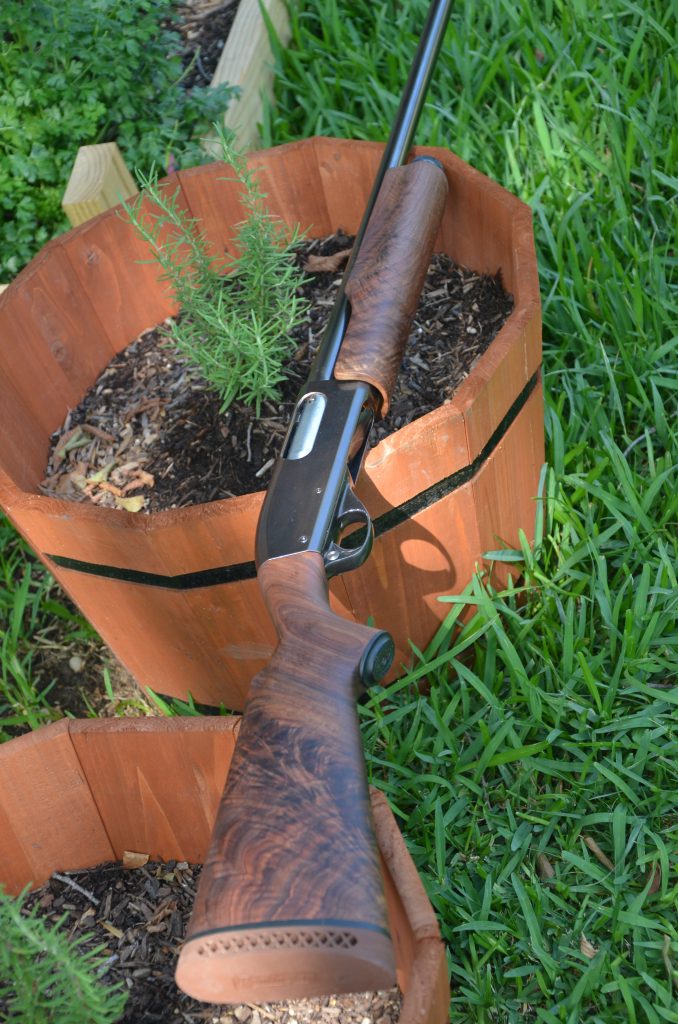
Remington 870, Wingmaster Shotgun
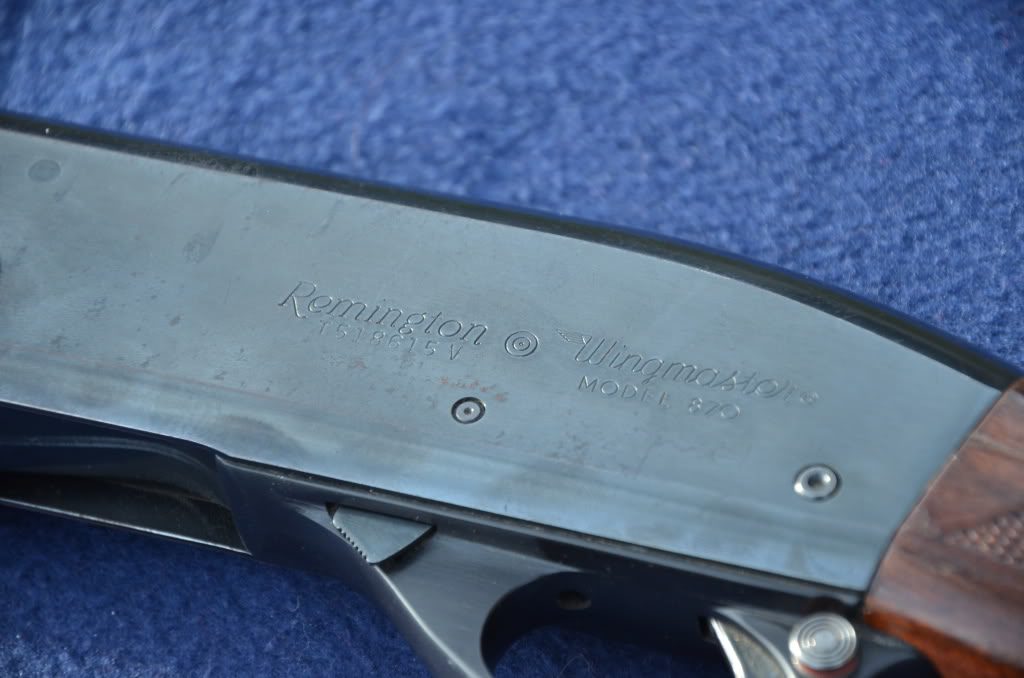
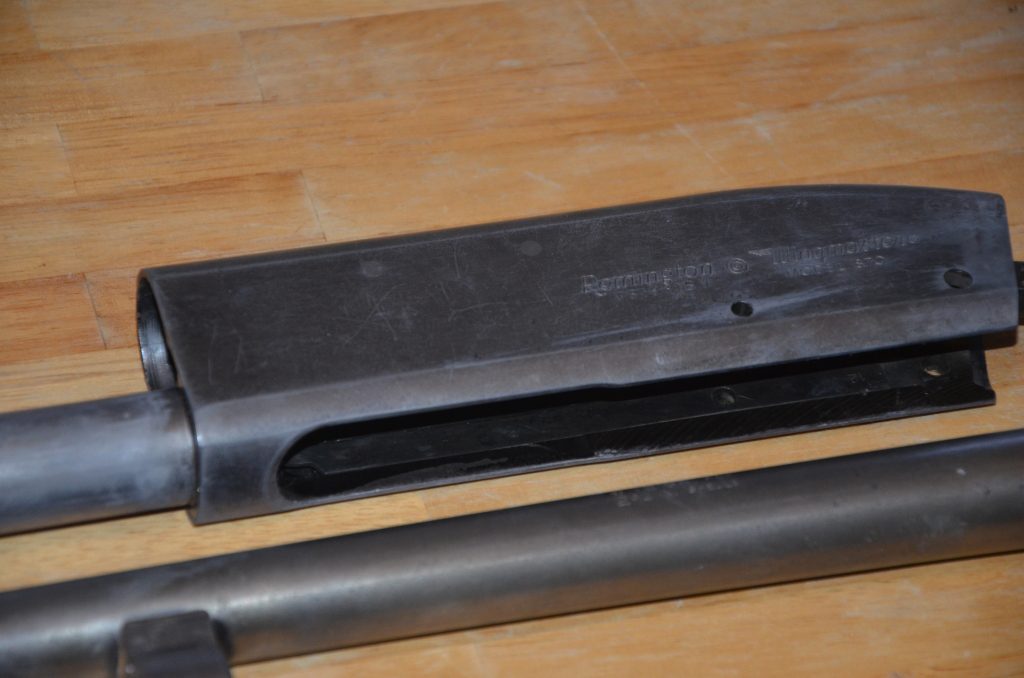
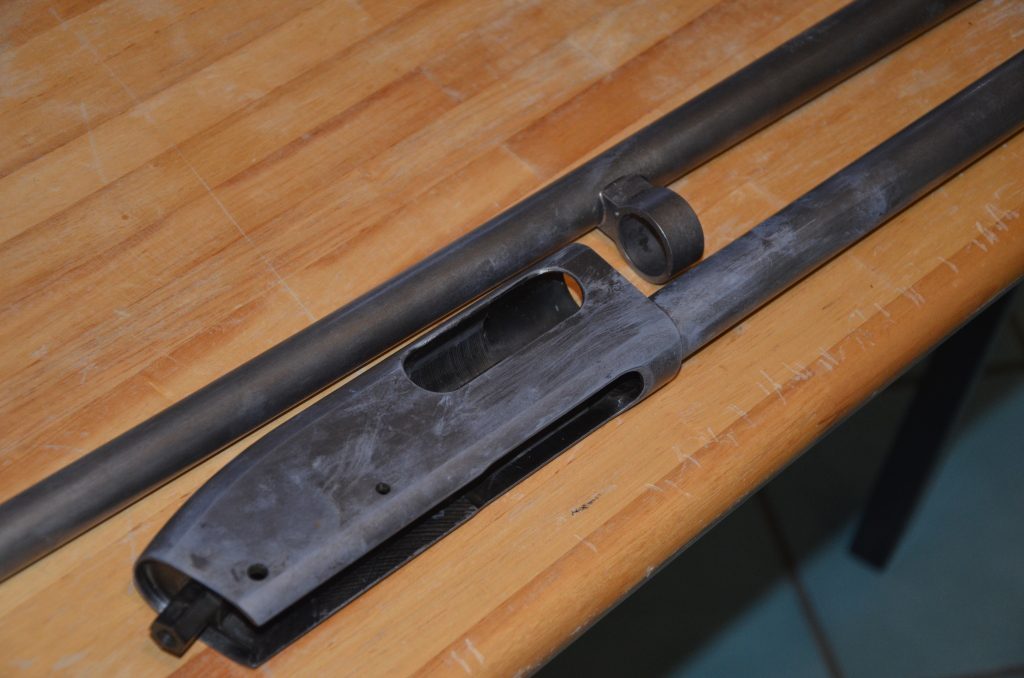
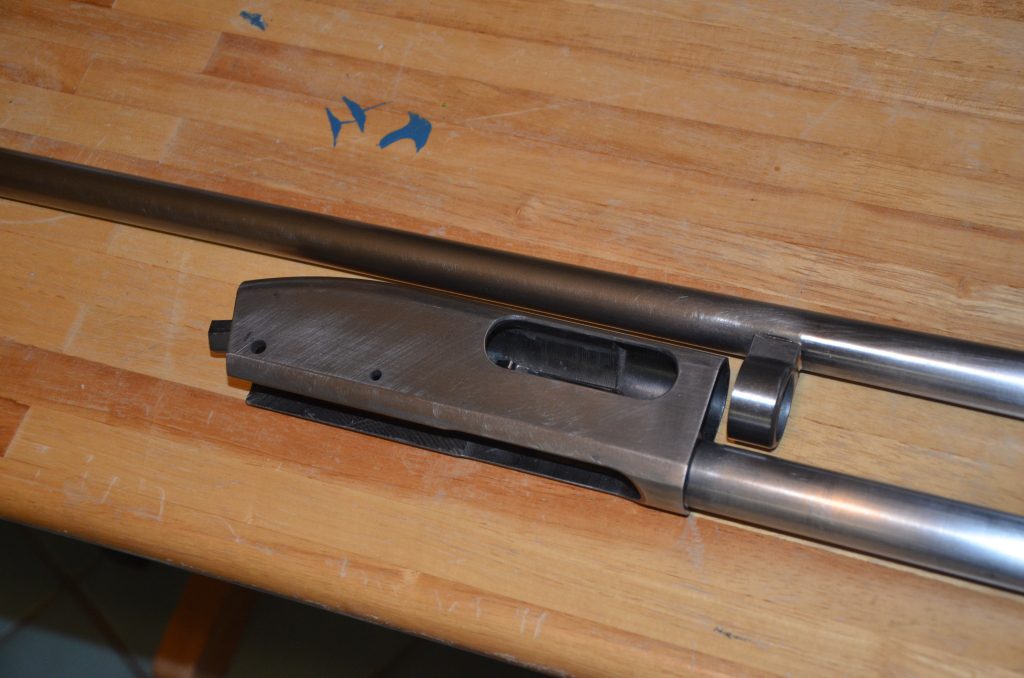
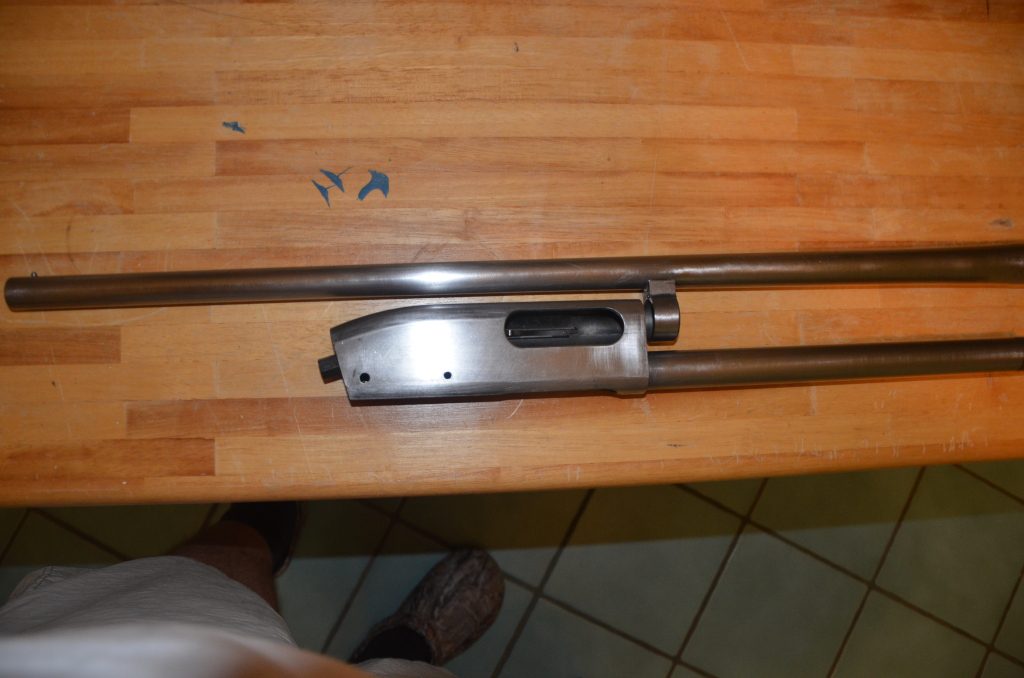
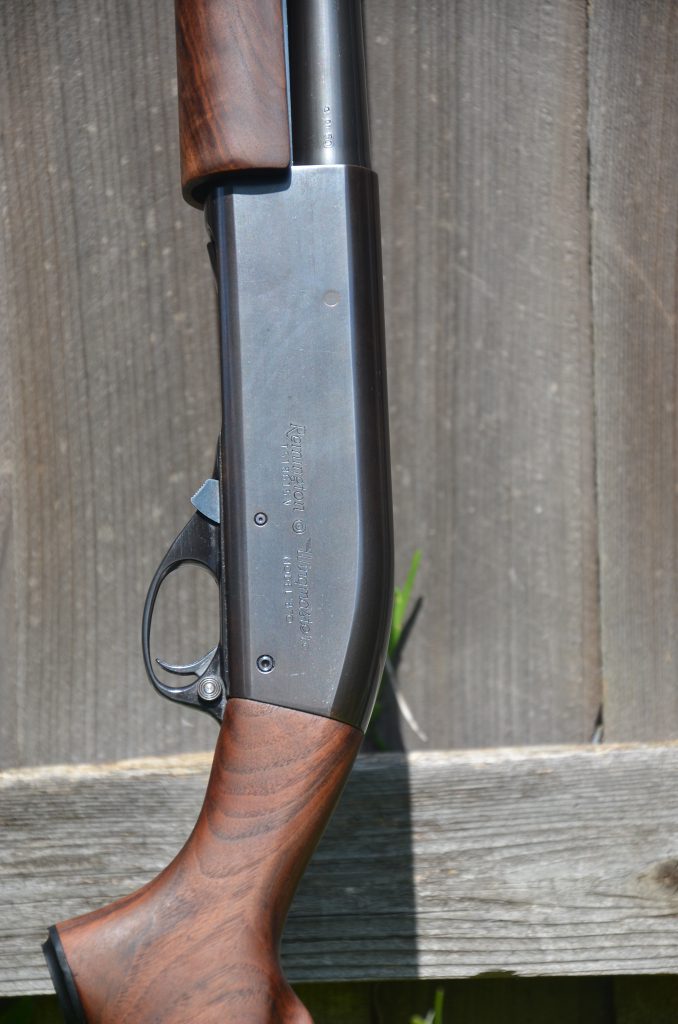
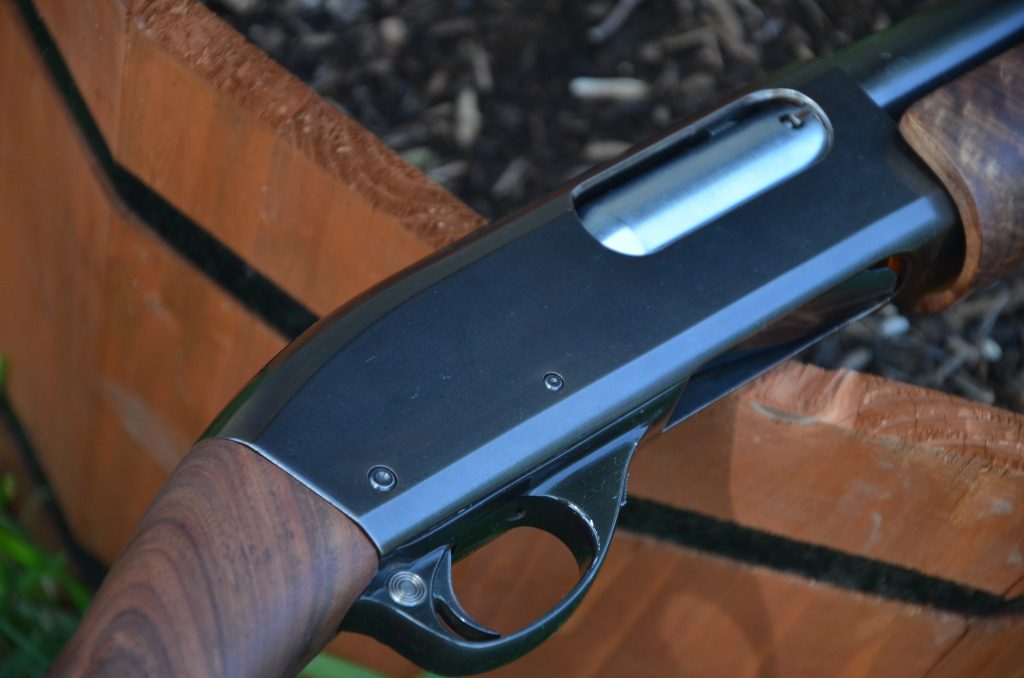
Remington 870, Wingmaster Receiver
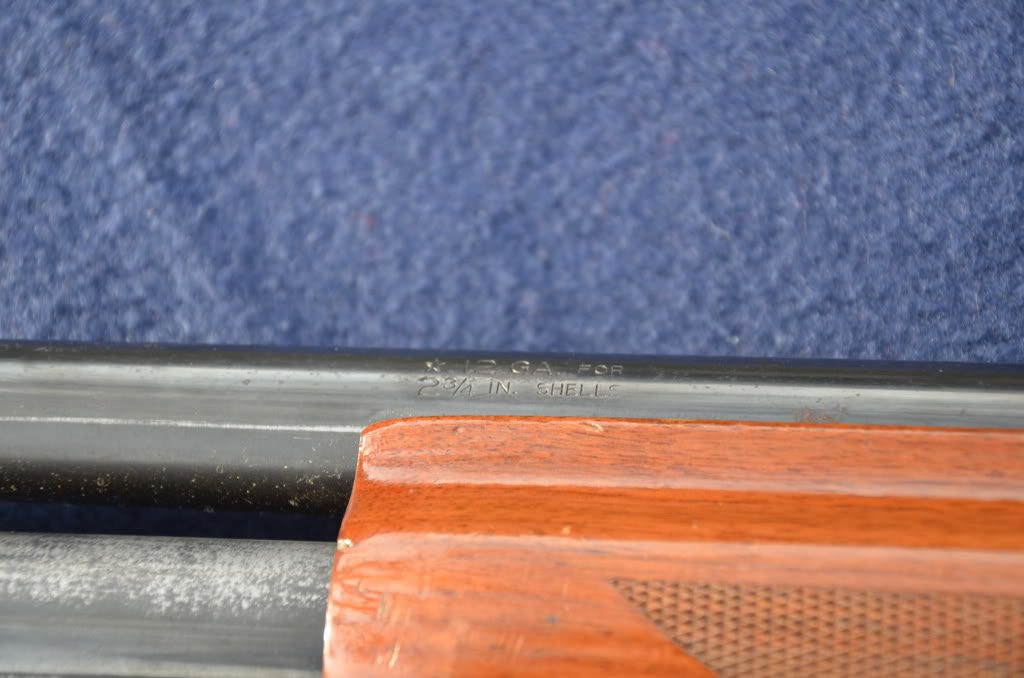
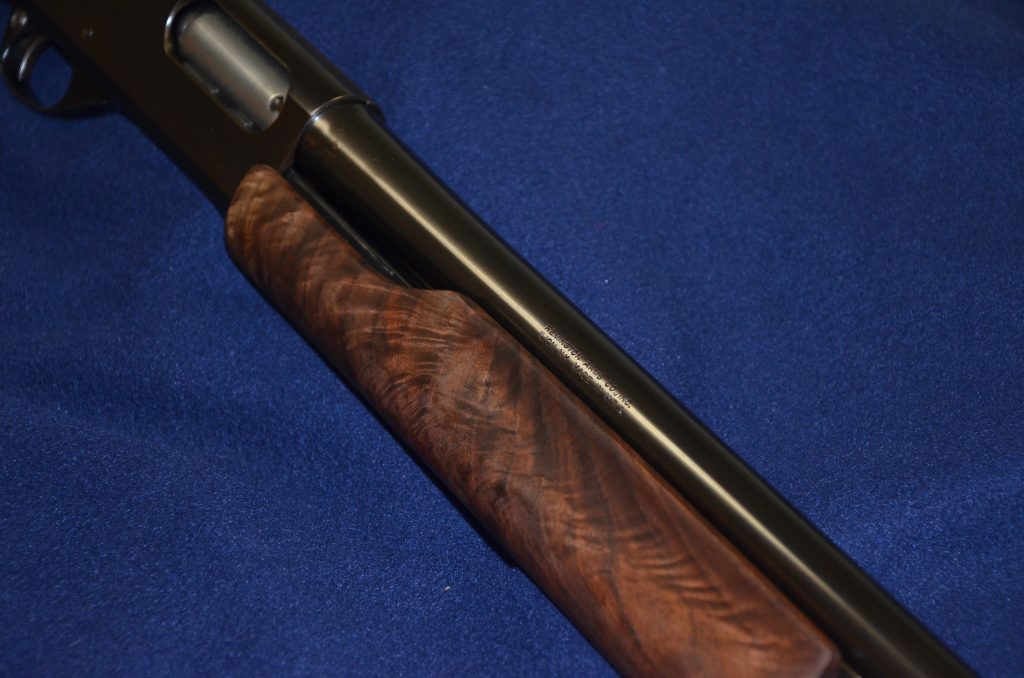
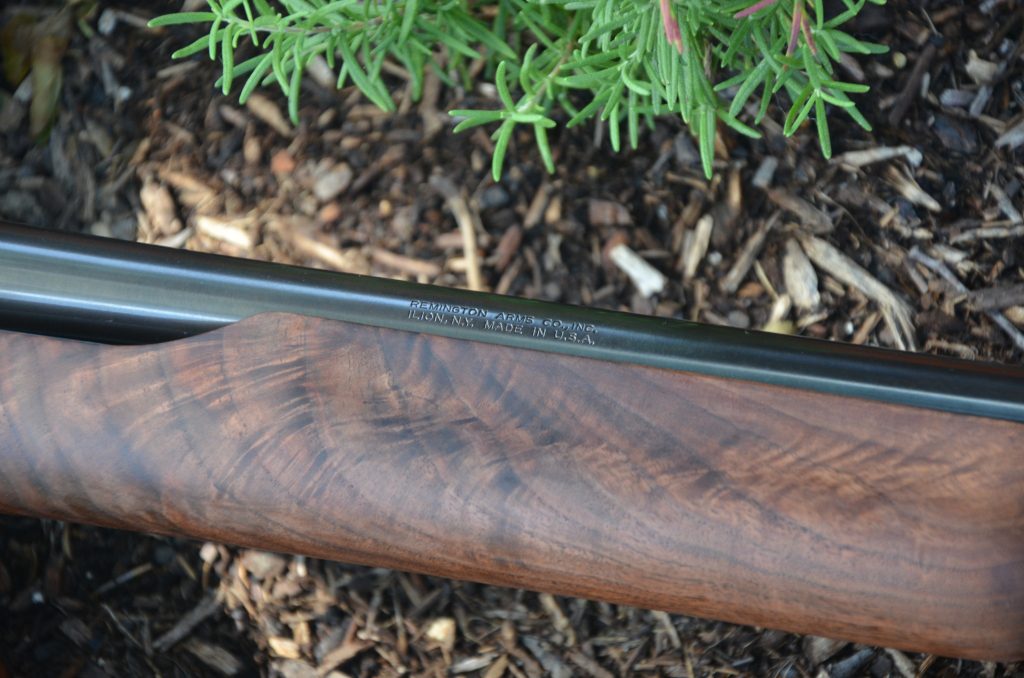
Remington 870, Wingmaster Barrel
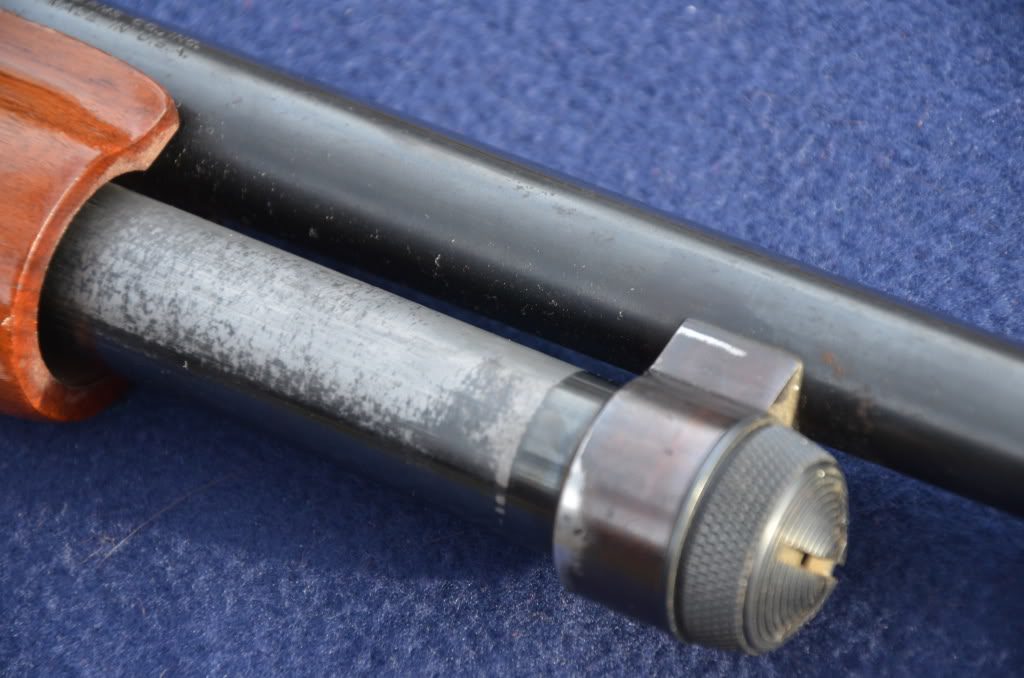
Remington 870, Wingmaster Magazine Tube
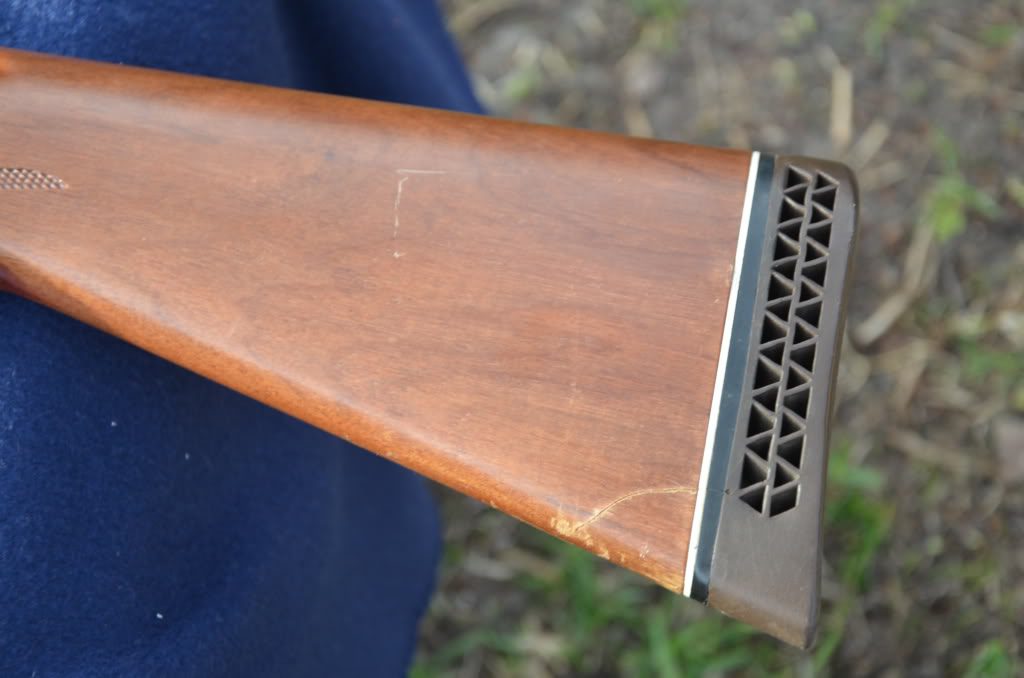
Remington 870, Wingmaster Stock
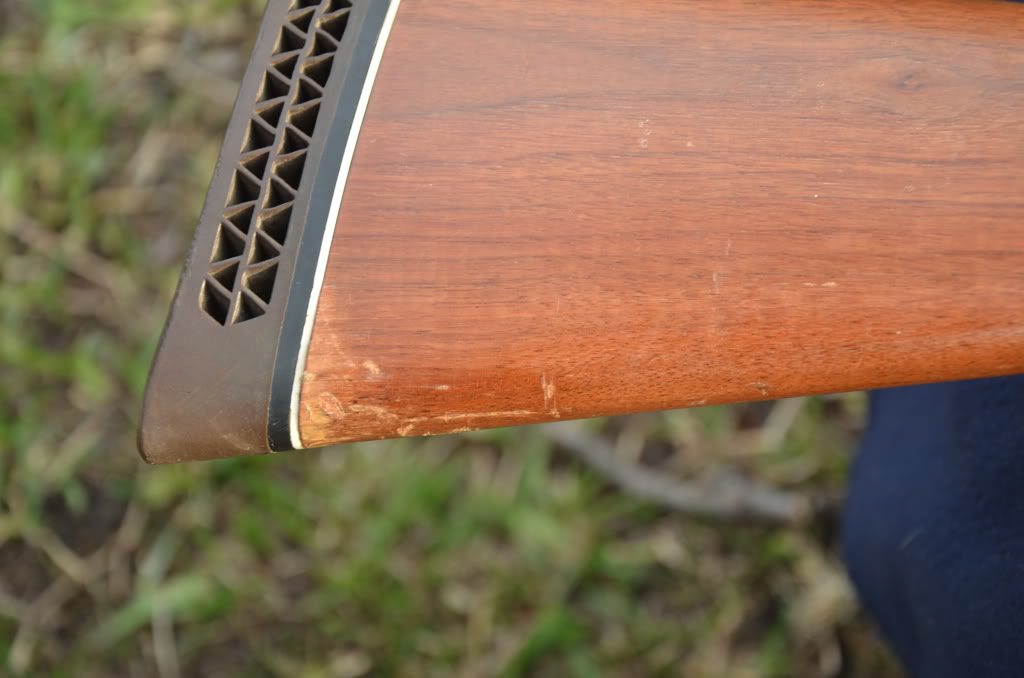
Remington 870, Wingmaster Stock
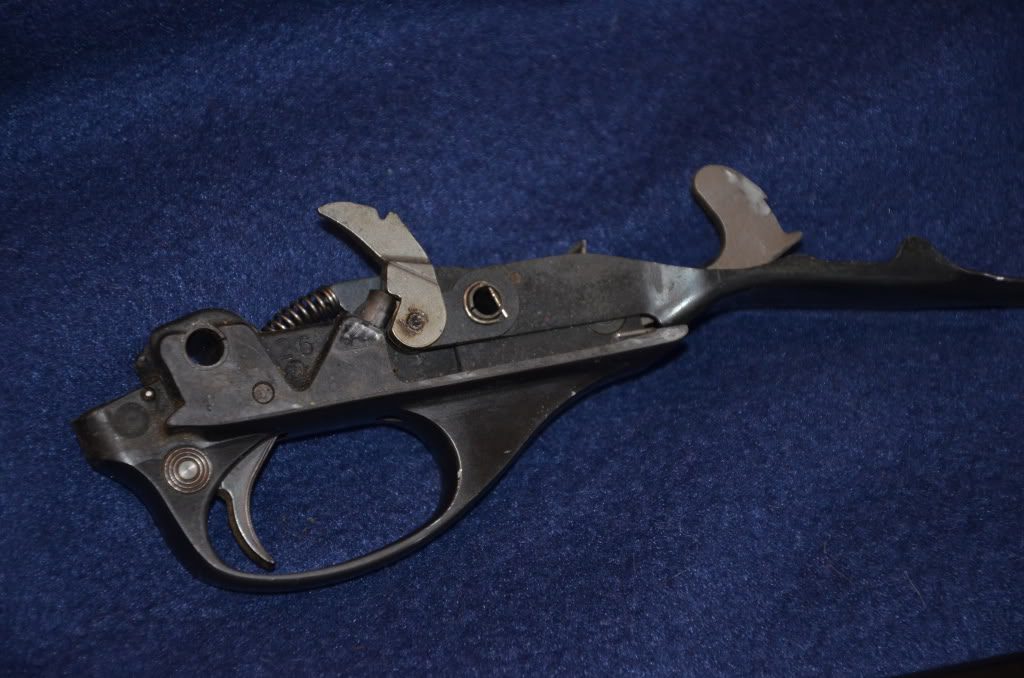
Remington 870, Wingmaster Trigger Group

Remington 870, Wingmaster Bolt
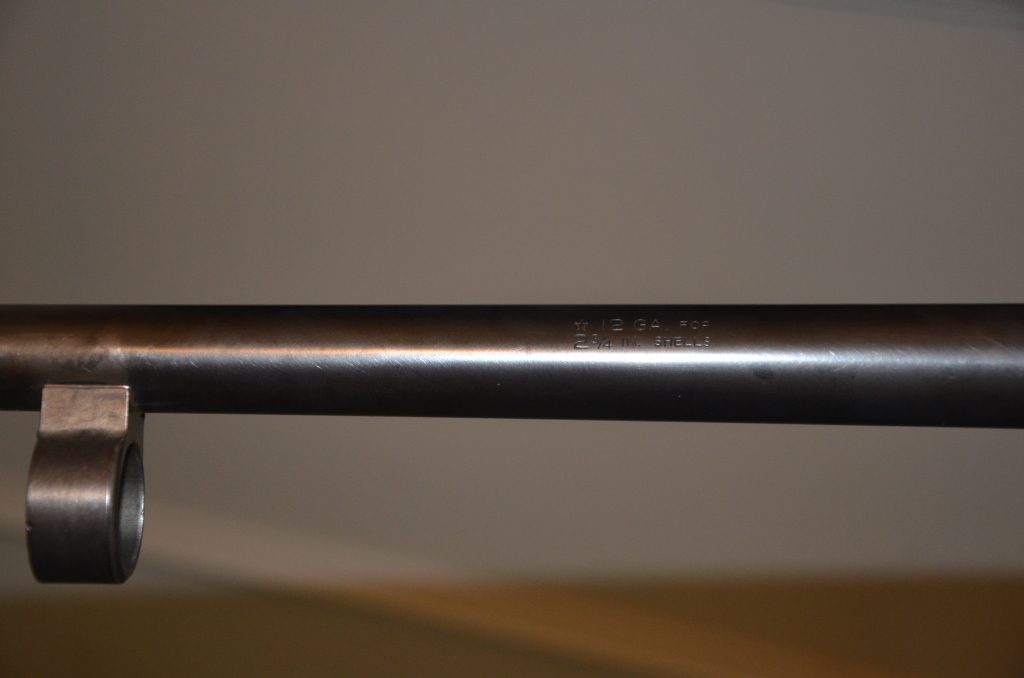
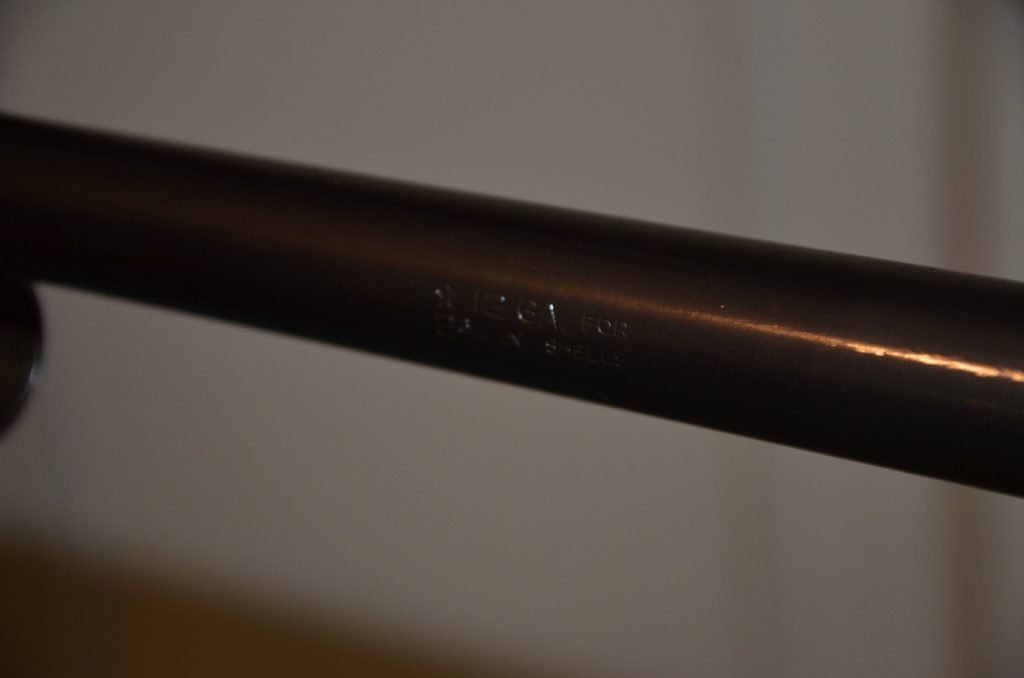
So, what did I end up with? It seems like a stock and forend that were cracked and needed to be replaced, and a lot of bluing wear and rust. The rust is actually doesn’t scare me that much, as it appears to be surface rust that will remove with a little elbow grease. The bluing will need to be redone, and I haven’t quite figured out my approach on that since I don’t have any bluing equipment in my garage and I’ve never done it before. The internals are very dirty, but are in surprisingly good shape and can all be used- and the trigger assembly is aluminum! New 870s have plastic trigger gaurds, so this was a nice surprise. I called Remington to check the date on the serial number- looks like I’m dealing with a 1976 model, and the 28″ Modified choke barrel appears to be original as well.
I think the best thing to do with this Wingmaster is to return it to better than new status- this will not become a home defense shotgun (honestly, you can buy an 870 Express with an 18.5″ barrel new for under $300 to be a home defense gun). My goal will be to end up restoring this shotgun to somewhere between a new 870 Wingmaster, which retails for around $800 and an 870 Wingmaster Classic Trap, which retails for around $1100.
A lot of you are thinking that is a lot of money to pay for a pump, and it is. My goal will be to have as close to the Classic Trap model as I can for the smallest amount of money possible…I’m targeting $600 or less total on the project. I love 870 pumps though, so I’m okay spending a little bit of money on this project even though I know I can buy two brand new, perfectly usable 870 Express models for that same $600 budget. This project won’t be about getting a functional gun for cheap, it’ll be about restoring a classic pump and adding some nice cosmetic touches to make it unique. I also don’t intend to sell it when I’m finished, so it’ll be something I can pass on one day down the road.
I’m $225 in for the gun itself, which leaves me $375 for restoration… this should be fun!
New Furniture
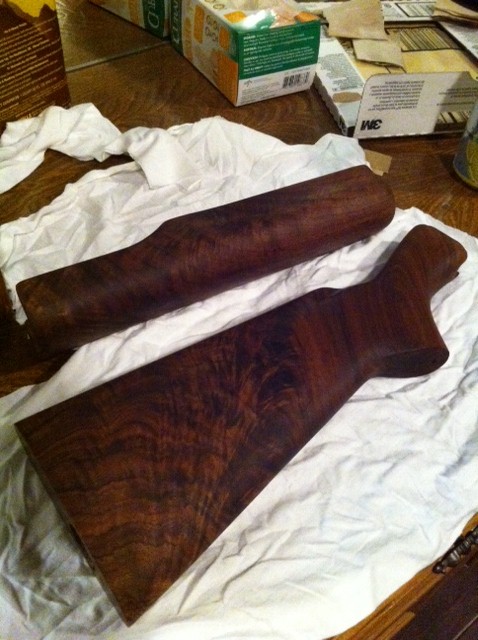
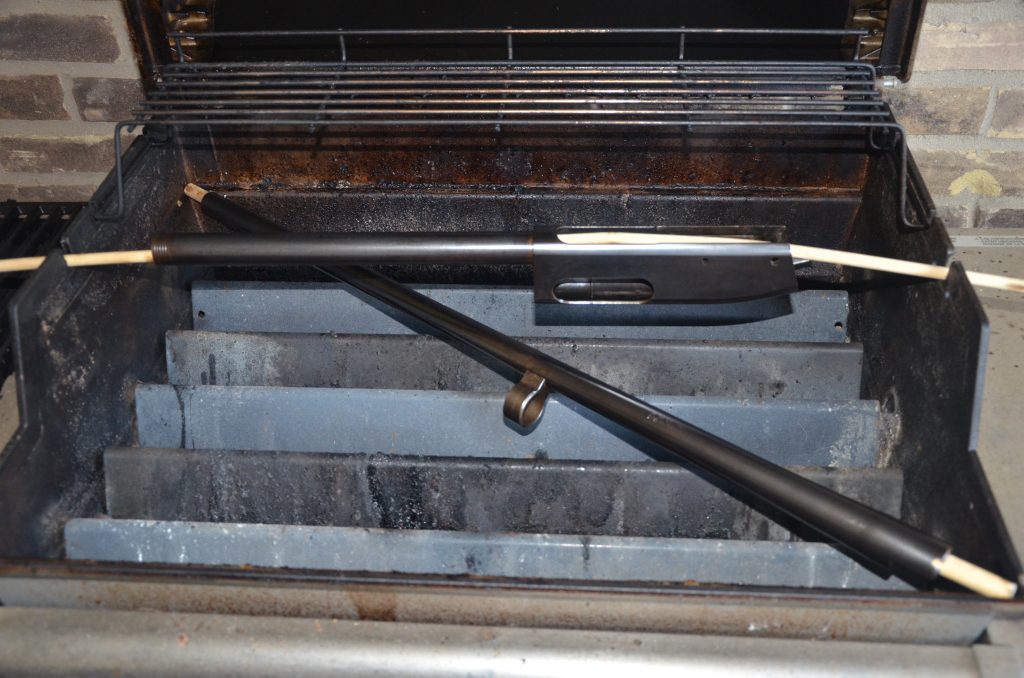
I found a good deal on a set of factory second wood for my Wingmaster. This is Trap grade wood that had some scuffs on it prior to finishing, so it didn’t end up on any shotguns that went out for sale. Great news for me, since it only cost $182 after shipping! I can smooth out the scuffs on my own, then refinish the stock and forend and it’ll be good to go on my project. It’ll save me loads of time and money over the other option I was considering, which involved buying a super nice blank set (around $500 for the blanks) and paying a pro to shape, inlet, and finish them for me (another $400 or so). That option was well out of my price range for this project, so finding this wood made me extremely happy. Here are some pictures of the wood as it sits today.
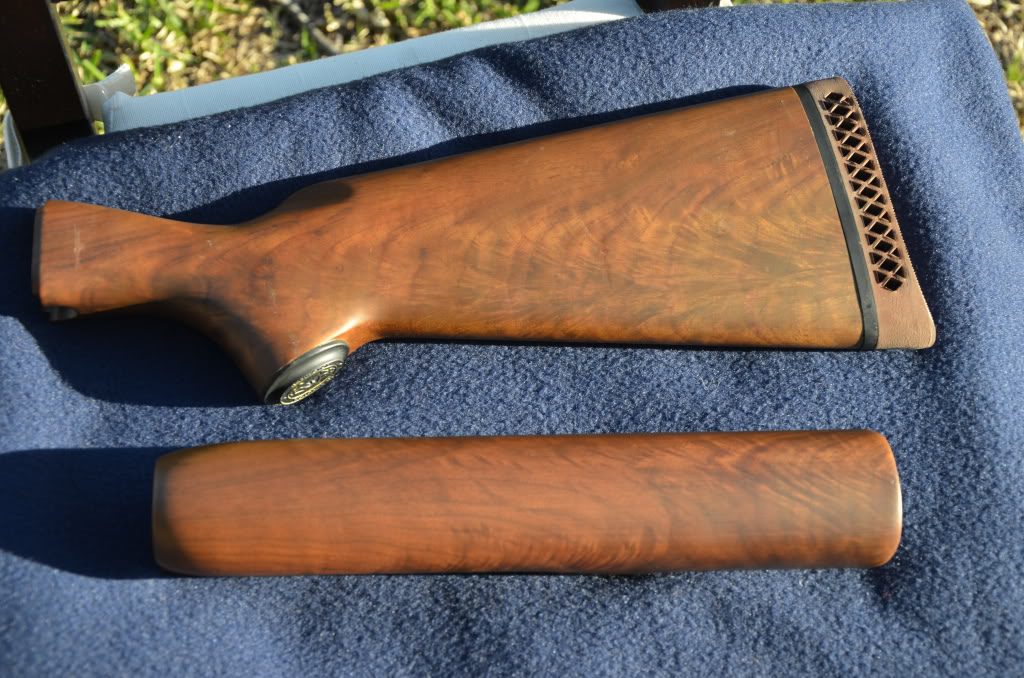
Remington 870 Wood Furniture
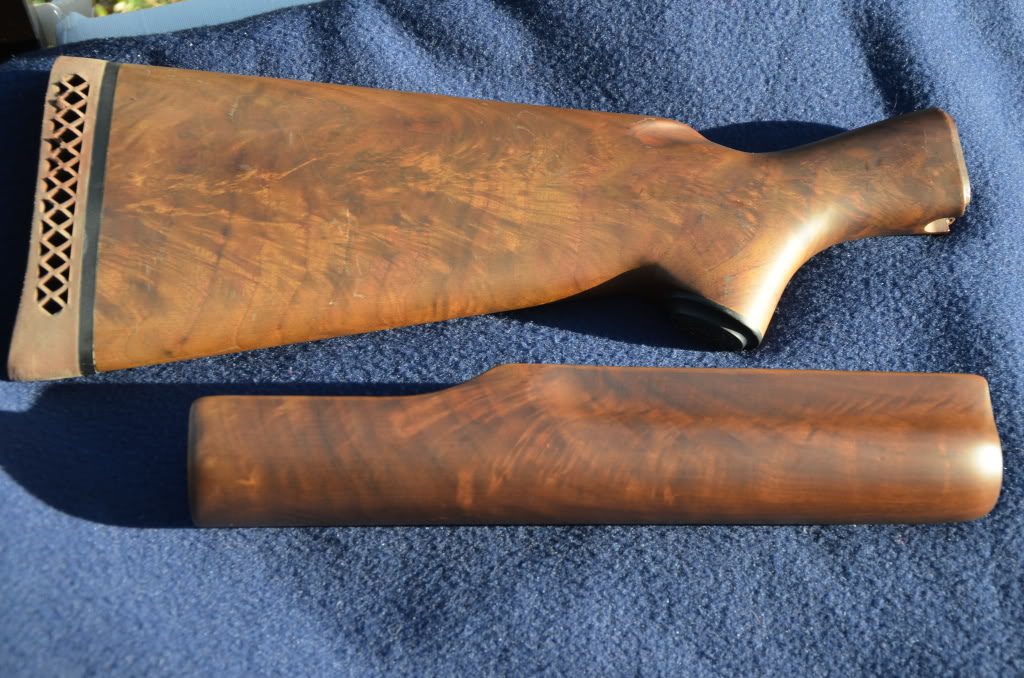
Remington 870 Wood Furniture
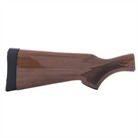 |
Get Remington 870 High Gloss Stock on Brownells |
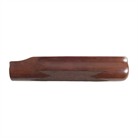 |
Get Remington 870 High Gloss forend on Brownells |
I’m still researching the best way to approach this- I don’t just want to start sanding away if there’s some prep work to be done first such as removing any oil or other chemical that’s already been applied. I also think I may replace the plastic pistol grip cap with a more dressy silver end cap just for aesthetics. I’ve seen some pretty nice ones, so plastic just doesn’t seem to be the way this shotgun is heading.
I also decided that I’ll attempt to blue the metal finish myself. I’ll be attempting the old school process of rust bluing. Because it will require time to sit in a pretty warm environment, I probably won’t attempt to start this until things warm up around here- since I live in Texas, it should be May or so before conditions are right. In the mean time, I’ll be trying to finish up my 1911 build and also get this stock and forend squared away.
In case you’re counting, with the $182 spent on the wood, I’m now $407 into my $600 budget. Even if I mess up the rust bluing, I can probably find a good person to help me with that end of it for under $200, at least I hope I can. With luck, though, the rust blue I’m planning will work well and I’ll be able to use the remaining budget on aesthetic touches. I’ll post updates as I get them…thanks for reading!
New Furniture (Again)
My apologies- it’s been quite a while since my last post! I’ve been busy with other projects around the house and in the yard, so Project 870 and Project 1911 have been neglected. I have ordered everything I need for finishing the Wingmaster though, so hopefully now that it’s getting warmer outside I’ll be able to get moving on the rust blue and refinished stock set. This post will be a short one, but hopefully it’ll be followed by another post this weekend with some more updates.
I decided I didn’t like the butt stock that I originally received, so I ordered another one and returned the original before getting started on it. The second stock I received looked much more like what I wanted, and also looked more like the forend. Here’s a couple of pictures:
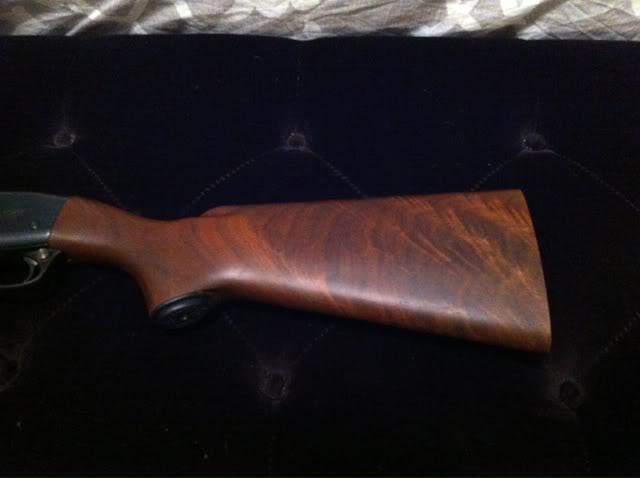
Remington 870 Wood Furniture
Remington 870 Wood Furniture
Refinished (stock and forend)
Well, I obviously didn’t do much on the weekend back in April! I did, however, remove the recoil pad and grip cap. Then, I started removing the finish on the stock and forend the other day, and finished up last night. It was very slow going- I started with 220 grit to break through the hard finish, which gave it a very flat, satin appearance before. Once I broke through, things went faster, and using the same 220 grit I was able to smooth out the dings and scratches in the wood, then using a finer grit paper I gave a final smoothing and was left with a clean, unfinished, very pale stock and forend set. I went very slow and checked my progress frequently by wiping it all down with a damp rag every now and then. The damp rag didn’t harm the wood due to the heat from the sand paper induced friction as well as being outside on my back porch on a hot Texas evening…it just removed the dust and then evaporated quickly.
I was in a zone, and I immediately wiped down and dusted off the stock and forend so I could get a coat of oil onto it…AND I FORGOT TO TAKE A PICTURE of what the bare wood looked like. I’m sorry.
But, here is what it looked like after applying just one coat of boiled linseed oil. As you can see, it pops much better than before with that horrible varnished finish…it should start to look even better as I add a few more coats over the next few days.
Refinished Stock and Forend of the Remington 870 Shotgun
once heard that, with a new stock, you should apply oil once a day for a week, then once a week for a month, then once a month for a year. After that, apply as needed or whenever you give the shotgun a good cleaning.
That’s what I plan to do…and I’m hoping to strip the rust and original bluing off of the metal this week and get started on the new rust-blue process. Fingers crossed!
Stripping!
Last night I was able to begin stripping the rust and original bluing from the old 870. The original bluing had faded and was showing wear, and I wanted to repair some of the nicks and scratches that had developed over time as well, so I stripped the receiver and barrel down to the bare metal using a Rust and Blue Removal chemical that I ordered from Brownells.
I took caution and wore a pair of gloves while working with the chemical. I first started by spraying some degreaser all over the metal, then wiping down with some 0000# steel wool to remove the surface rust and “break” the outer layer of bluing. I then used a clean cloth with a little of the chemical agent, and began applying to the metal in small areas, and using a bit of elbow grease to work it onto the metal. After about an hour of applying, then rubbing, then wiping clean, I was left with bare metal that had a very matte finish to it and allowed me to easily see some scratches and dings that needed sanding.
Remington 870 Wingmaster Stripped Receiver and Barrel
Remington 870 Wingmaster Stripped Receiver and Barrel
I sprayed on some more degreaser- not sure if it was needed but I wanted to do it anyway to remove any leftover chemical residue. I wiped it down with some more steel wool, and then broke out the 220 grit sandpaper to sand out some of the scratches and dings. After another 30-45 minutes of more elbow grease, the metal was bright and shiny, and I had removed all that I’d be able to for the purposes of this project. I added a thin coat of gun oil to keep it in good shape over night until I’m ready to work with it again.
Remington 870 Wingmaster Stripped Receiver and Barrel
Remington 870 Wingmaster Stripped Receiver and Barrel
As this is an old shotgun, there are simply some signs of aging that I am not going to be able to remove, as I’m not a gunsmith. I don’t want them gone, really- they add character. The major dings and scratches are gone though, and anything that remains will be covered by the new layers of bluing in the next step and will need a close examination to see. That should be satisfactory for me.
My next step is to take some 600 grit paper and give a final smoothing out to the metal- currently you can see the strokes I made with the 220 in some areas. I’m not looking for a mirror finish, so I’ll give it a once over with the 600, being careful not to remove any more metal from any of the areas with engraving, and then give it a final buff with some of the 0000# steel wool. I plan to do this tonight, as well as do all of the stripping and smoothing to the forend tube assembly, which I forgot to do last night when I had all of the chemicals and materials out and open. My trigger housing, as well as the rest of the shotgun’s internals, is in pretty good shape so I’ll leave that as is for now…I can always change my mind later!
I have tomorrow set aside to work from home, so I’ll actually have time to do the rust bluing process…hopefully. I’ll post pictures of the final metal preparations I make tonight as well as the beginning stages of the rust blue process once I get that going either tonight or early tomorrow morning. It’s a lengthy process, but the temperature and humidity should both be pretty high tomorrow so I’m hoping to get it all wrapped up then.
Thanks for reading along!
Getting the blues
Okay- so last night I got home from work and immediately set in with final metal preparation. I went with a 400 grit instead of a 600 because I really don’t want to get too polished of a finish and I’m hoping the 400 will give me a final look of slightly more “aged” and not new. It is a 36 year old shotgun, after all.
 |
Get Pilkington’s Rust Blue on Brownells |
After polishing, I used a sophisticated (ha ha!) system of wood dowels and patio chairs to suspend the metal. I then applied the Pilkington’s Rust Blue chemical using cotton and taking long, steady swipes along the metal. I wore vinyl gloves during this- I have them on hand for reloading, and the Pilkington’s instruction booklet suggests them over other gloves, so there you go. The bare metal began to react almost immediately, turning a mixture of bright turquoise and burnt orange. The shiny silver spots are bare metal that I missed on my first pass…it’s okay, I’d get them on the second pass and it’s recommended to take that approach rather than messing up what you’ve already done- the chemical will mess itself up if you let it!
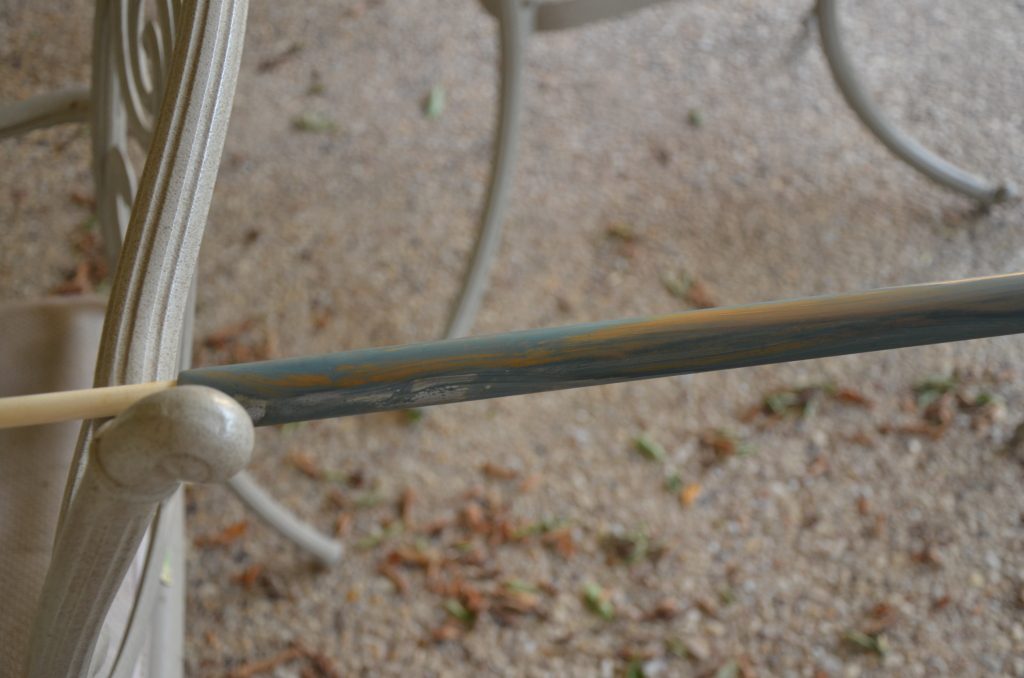
Remington 870 – Applying Rust Blue
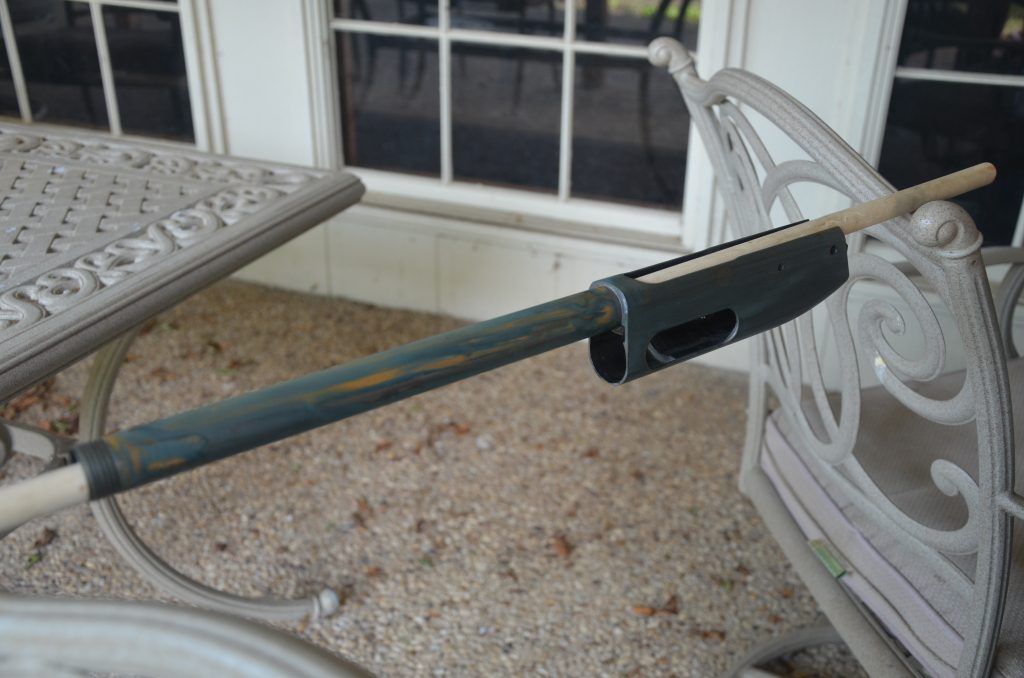
Remington 870 – Applying Rust Blue
After an hour of letting the agent do its work, I went back, per the instructions, and applied another swipe and was sure to hit the areas I missed the first time. I then let the metal sit for THREE hours while the chemicals had their fun. What I did while waiting was perhaps the most IMPORTANT part of the whole process- I made myself a drink. Fine bourbon makes the wait go much faster!
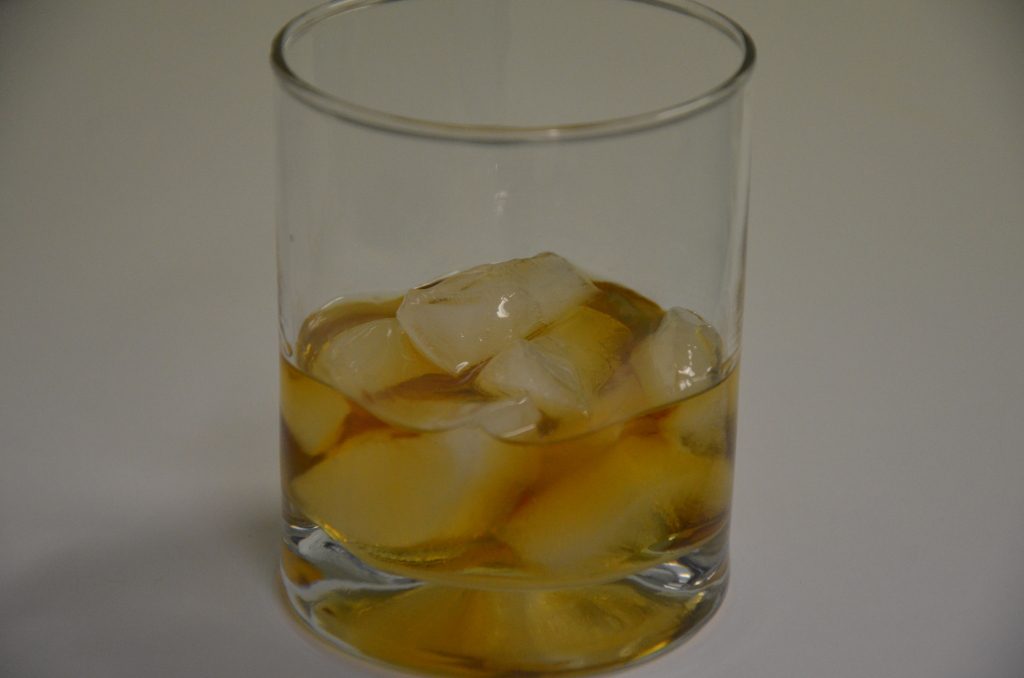
Bourbon
When the three hour wait was over, I got out the cookware. I have a double burner Camp Chef propane stove that I use for tailgates, and when I decided to do this project I custom ordered a parkerizing tank online from Stainless Steel Creations. Let me tell you- they make a good tank. After I pulled the metal from boiling water, and took about 45 minutes prepping it again for the next chemical application, then letting the chemicals go for another 3 hours, the water in the tank was still pretty warm. That may not seem like a big deal, but it sure speeds things up when you’re bringing it to a boil rather than starting with cold water. And at 2:45 in the morning, speed is key because if I would have had to wait too long, I’m sure I would have fallen asleep! Here’s a pic of my setup during the daylight hours. I didn’t have any heavy wire around, so I used rope and tied it to the ladder for support (and to keep the rope ends away from the flames below!).
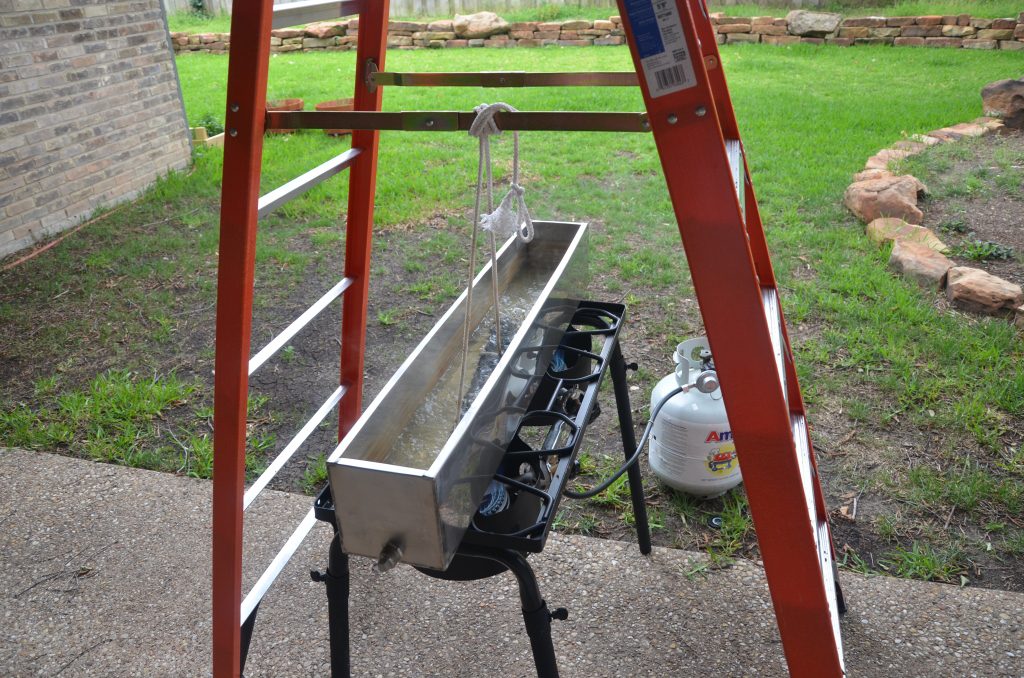
Parkerizing Tank
After one application/boil, the metal had turned into a dark, velvety black. I used a 0.003 wire carding brush from Brownells to remove the velvety boiled rust, and was left with a medium steel grey blue color. Not a bad start!
Remington 870 Barrel After One Application
Remington 870 Barrel After One Application
As I stated before, I then wiped everything down and applied another round of rust blue agent, then went to bed. At 2:45 in the morning, I woke up and started the burner stove again, boiled, carded, reapplied chemicals, and went back to bed. Then I did it all over again around 9:00 this morning (I know, a little longer than 3 hours, but hey, I was tired!).
The metal is now sitting on my porch with its 4th application of chemical agent. I’m going to let it sit a while longer this time, as the metal is picking up less and less color each time, so I want to make sure it has a chance to do its work. I’ll post more pics and updates after I’ve finished the rusting process and applied some oil to ready it for a final bake/cure.
Almost (re)Finished!
After 5 applications of the Pilkington’s solution, 5 rounds of boiling, and 5 rounds of carding, I was finally getting somewhere. I then applied a generous layer of Brownells Boiled Linseed Oil to the metal and let it sit. As you can see, the boiled linseed oil really smoothed out appearances and made the metal quite dark- almost pure black.
Oiled Barrel Remington 870 Wingmaster
The plan was to let the oil sit for a couple of hours, then wipe it down and bake it for an hour at 300*F…however, I underestimated my ability to remain awake, and I ended up letting it sit over night. The next morning, I used a clean rag to pick up the barrel for examination, and immediately was angry- the boiled linseed oil had turned to a super sticky mess and clung to the rag, picking off pieces and fibers!
I was in a hurry, since I had to go into the office instead of staying home, so I quickly degreased both the barrel and receiver, then applied another layer of boiled linseed oil and let it sit for about 20 minutes….then I put it over some heat.
I am fortunate in that my gas BBQ grill is large enough (never large enough, but for this, it worked) to accommodate both the receiver and the barrel. After removing the cast-iron cooking grates (you don’t want to mess those up!) I had to get creative with the dowels- I cut one to fit diagonally to hold the 28″ barrel (I had 30″ of diagonal play, and with the barrel hood, it measured 29″), and I placed another in the rotisserie slots to hold the receiver across the length of the grill. A couple of my wife’s 2lb. hand weights held the ends of that dowel down to prevent sagging in the middle where the receiver’s weight rested.
Baking Barrel Receiver Remington 870
An hour at 300*F (~150*C for those outside the US) and I pulled them off to cool. Once cooled, I used 0000# steel wool to buff out the build-up of baked oil residue. A slick, smooth finish was left when I was done. Indoors, it looked steel grey with some hints of brown…outdoors, it looks blue/silver/grey. Hard to describe, really, so here’s a picture.

Refinished Barrel – Remington 870
Finally, taking the advice of a knowledgeable user of an online forum I frequent (www.Rem870.com), I applied a layer of mineral oil, let it sit for a couple of hours, and then baked it the same as I had before with the boiled linseed oil. Mineral oil is much less messy, so this step was pretty smooth and easy. The result, well, I think it turned out pretty okay for my first attempt at all of this. I let it cool and then lubed it all up with some regular gun oil and let it sit overnight indoors.
This morning before work I wiped off the excess oil and assembled the shotgun, complete with the refinished wood I did and mentioned a few posts back. The only things I did not re-install were this tired old magazine spring and rather unique plug, and the worn out plastic follower.
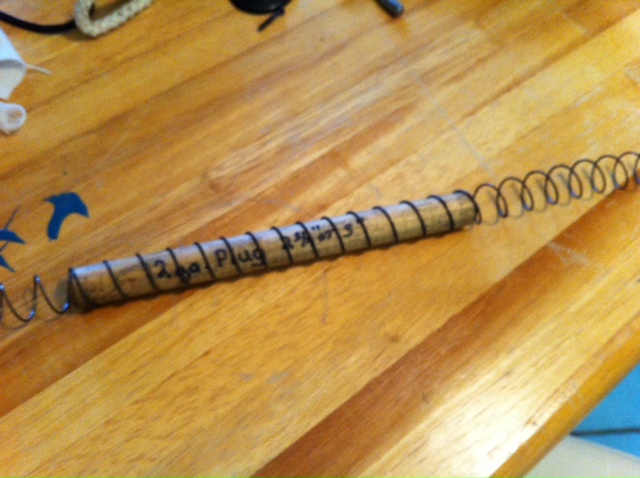
Old Magazine Spring and Plug
I have a new aluminum follower, spring, and polymer magazine plug on order with Brownells that should arrive this afternoon. Once they arrive, I’ll install them and then head outside for some decently lit photos. It was raining this morning, so I couldn’t get any good pictures, but here is a sneak peak from my kitchen…
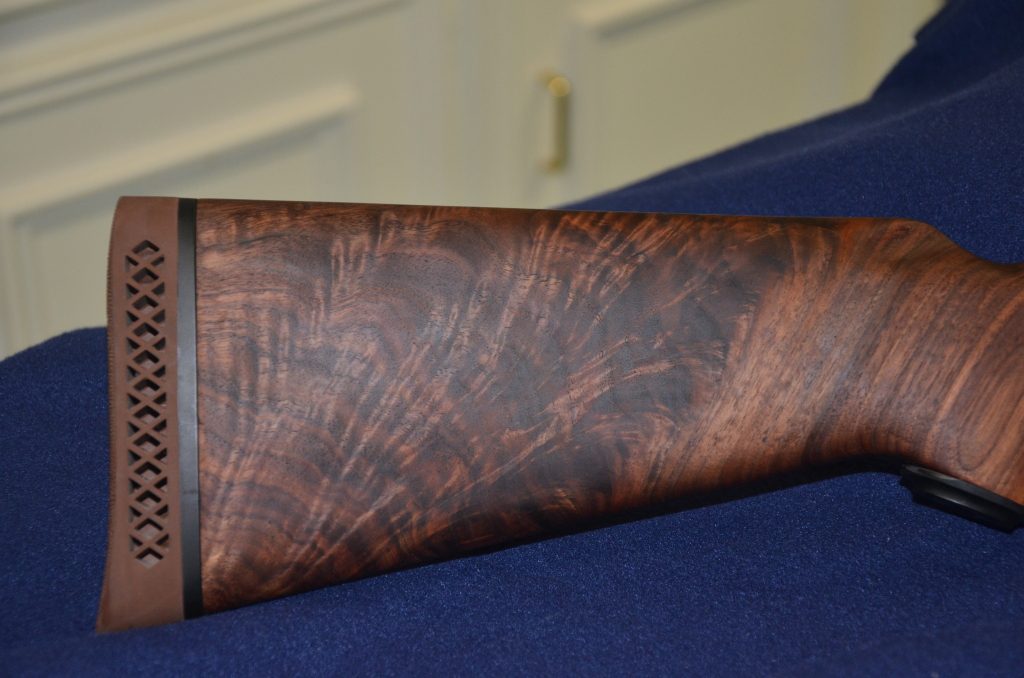
Refinished Stock, Forend on Remington 870 Wingmaster
Refinished Stock, Forend on Remington 870 Wingmaster
Refinished Stock, Forend on Remington 870 Wingmaster
The lighting is poor, so be sure to check back when I get the better pictures uploaded tonight assuming the shipment arrives from Brownells. If not, I’ll get them up on Monday. Thanks for viewing!
The End!
Finally- it’s finished! The magazine plug, spring, and aluminum follower arrived from Brownells today. No picture, but if you look closely in some of the shots below you can see the orange peeking through the bottom of the shotgun. I’m pretty relieved that this is complete- it was a lot of fun, but I was very nervous that it wouldn’t turn out. I was also nervous that I’d break my budget, but I didn’t!
Here’s the breakdown- most of the supplies I already had laying around (steel wool, oils, degreasers, etc.). The items below are pretty much all I had to pick up:
1976 Remington 870 Wingmaster – $225
Scuffed/discarded Trap grade (factory second) replacement stock/forend set – $183
New magazine spring, plug, and follower – $27
Rust remover and Rust blue – roughly $20
Loads and loads of elbow grease!
My original budget was $600, and my total came to $455. That leaves me some cash leftover to put toward my next restoration!
Most of you want to see pictures- don’t worry, I’m almost there.
I need to start by saying that the coloring is not what I had hoped- I was looking for more of a matte/satin finish with a black/blue appearance. I ended up with, well, it depends on the light! In some light it appears a blue/silver, in others, silver/grey. In direct sunlight, it almost glows in a rust brown that looks incredibly deep as if it had been applied through several layers of paint much like on an Italian sports car.
For my first attempt, however, I’m pleased. The goal was to remove scratches, dings, and rust on the metal, and to replace the wood with a better stock. I’ve taken the long way to do it, but all goals have been accomplished. And, if I really want, I can redo it again with another rust blue agent and some different combinations of oil to get a different color altogether. Perhaps I’ll wait on that one, though, until I finish my 1911 or some of the remodeling on the house that I promised the wife I’d tackle.
Alright- most of you are tired of reading and just want to see the results, so here!
Remember when I first brought the Wingmaster home?
Here’s the transformation!
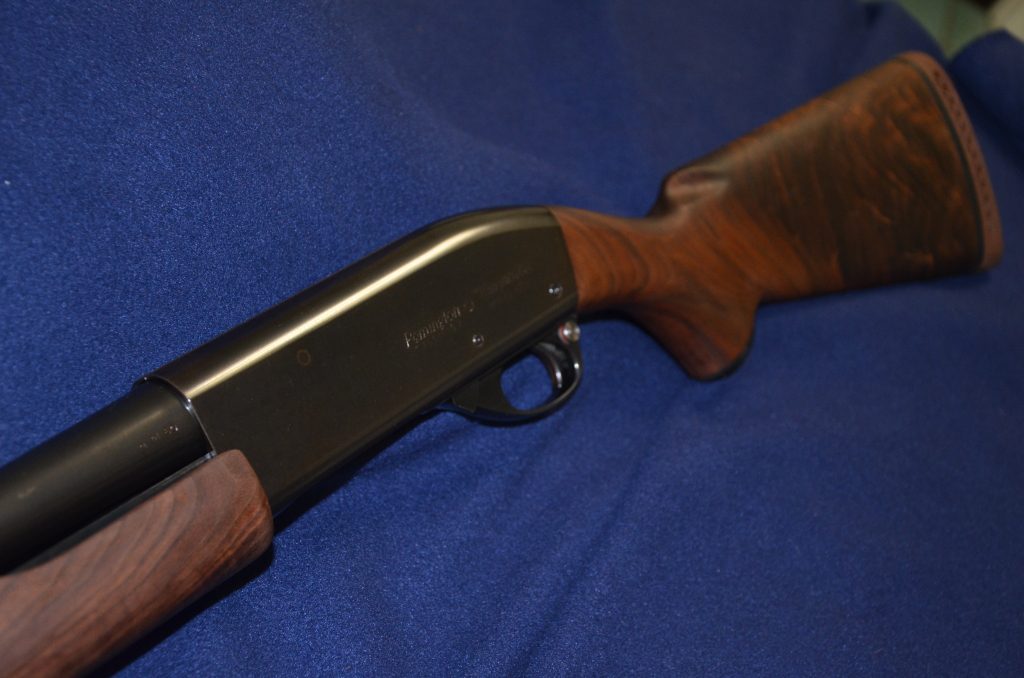
Remington 870 Wingmaster Refinished
Remington 870 Wingmaster Refinished

Remington 870 Wingmaster Refinished
Remington 870 Wingmaster Refinished
Remington 870 Wingmaster Refinished
Remington 870 Wingmaster Refinished
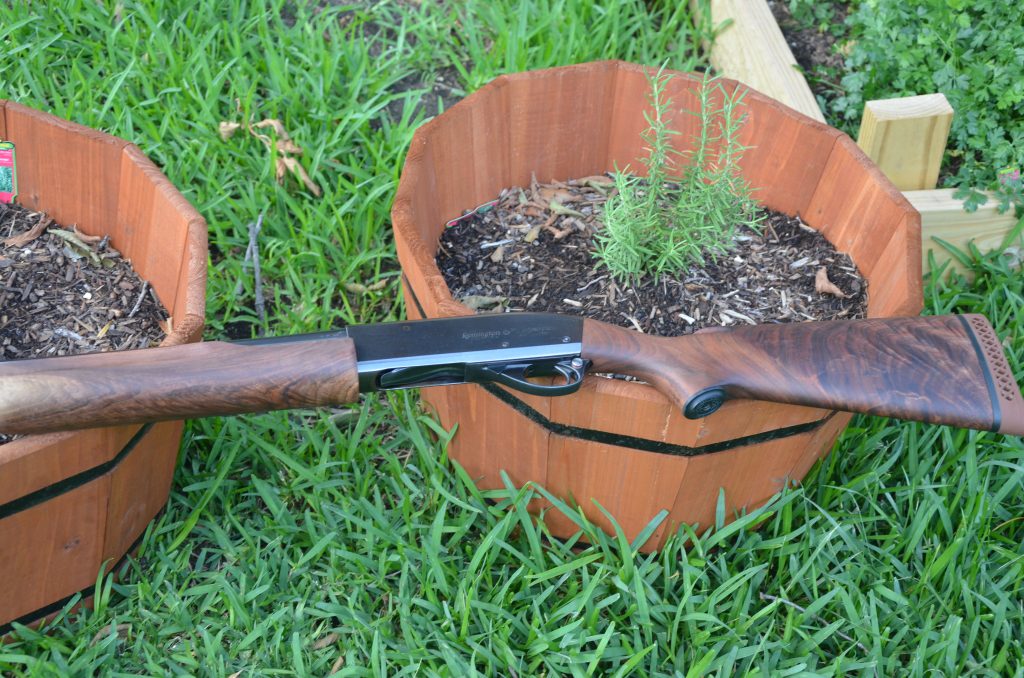
Remington 870 Wingmaster Refinished
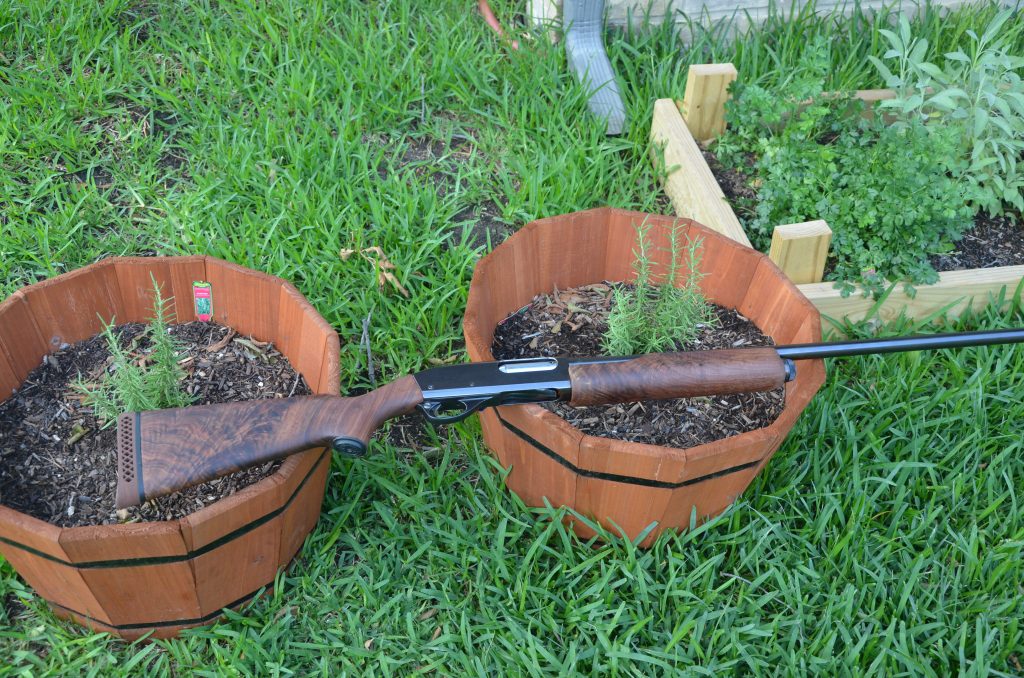
Remington 870 Wingmaster Refinished
Some dust and fibers from my cotton cloth ended up on the metal in some of the shots…I guess I need to be better about preventing that right before a photoshoot next time. Oh well.
Be sure to scroll to my first post to see more photos of the 870 Wingmaster when I first picked it up at the pawn shop…it was obviously a very fun project and I am already keeping an eye out for another to start on.
Thanks for reading!


Looking great! Fantastic job. It’s nice to see someone take the time to restore a fine old shotgun, and more importantly, show others that it’s not that hard to do.
Keep up the good work!
Where did you get the replacement stock?
Where fan Ivfind a stock for my .410?